YIMBYtown Presentation: Photography For Urbansits
About Me
Before I went to urban planning grad school and poisoned my brain with housing Discourse, I was a professional photographer for ten years. I mostly shot downhill skateboarding; but also did portrait, product, and real estate photography. Nowadays I work at California YIMBY, where I do policy analysis and run the organization’s microblogging accounts.
Okay cool, but what does photography have to do with YIMBYism?
We are in the business of changing people’s built environments, and imagery can help show people what proposed changes will look like.
No shit. We have all seen architectural renderings. Why should I care about this?
Images affect how people think and feel about proposed change.
By understanding how different kinds of images shape people’s perceptions, we can make images that persuade people to support change.
This is a workshop about how to use photography to shape people’s perceptions of the built environment. If I do my job well, you will learn how to (a) make flattering (or unflattering!) photos of buildings and urban environments, and (b) understand the visual tools that planners, architects, and engineers use to sell their projects.
Our Tools: The Camera and Lightroom
Part 1: Using The Camera
We will not be talking about the technical aspects of photography in this workshop; but hit me up after if you have questions.
The camera is a frame for the world. You have choices about how to fill that frame.
Where you stand and how you hold the camera shapes how people perceive what you are photographing.
Where do you stand?
You probably want to show the building’s good side.


Dead-on view vs ¾ view: do you want to emphasize the building’s facade or its 3-dimensional shape?


Focal length matters!
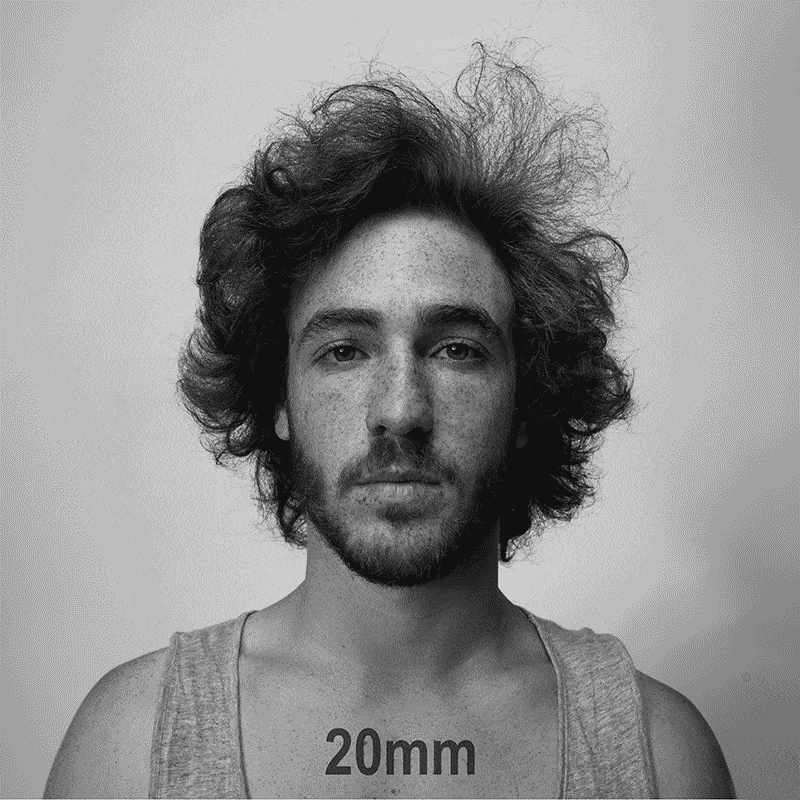
Wide angles emphasize what is in the foreground of a photo, often making it stand out from the background.
Longer lenses visually “compress” depth, making things look like they are closer together.

Wide angle, close-up shots of buildings emphasize their size and make them look like they are towering over their surroundings, and the viewer.

Long lens shots de-emphasize the building itself and show how it fits into its surroundings.

Camera Height
Photos shot from eye level generally show what it’s like to experience a building as a pedestrian.
Photos shot from up high show how a building fits into its surroundings.

Photos shot from down low often emphasize the foreground and landscaping
In general, you want to photograph interiors from about waist height, which is flattering to the furniture and helps get both the floor and ceiling in frame.


Framing
What’s in the frame? What’s not in the frame? You may want to crop out unpleasant or boring aspects of the scene.


Framing devices: the frame within the frame.

Foreground, middle ground, background.
Use negative space.

Some Good Habits
Level the camera and hold your camera straight upright, so the vertical lines on buildings appear vertical in your photo.


Zoom with your feet: taking two—or 200—steps back is often the best way to get the whole building in frame.

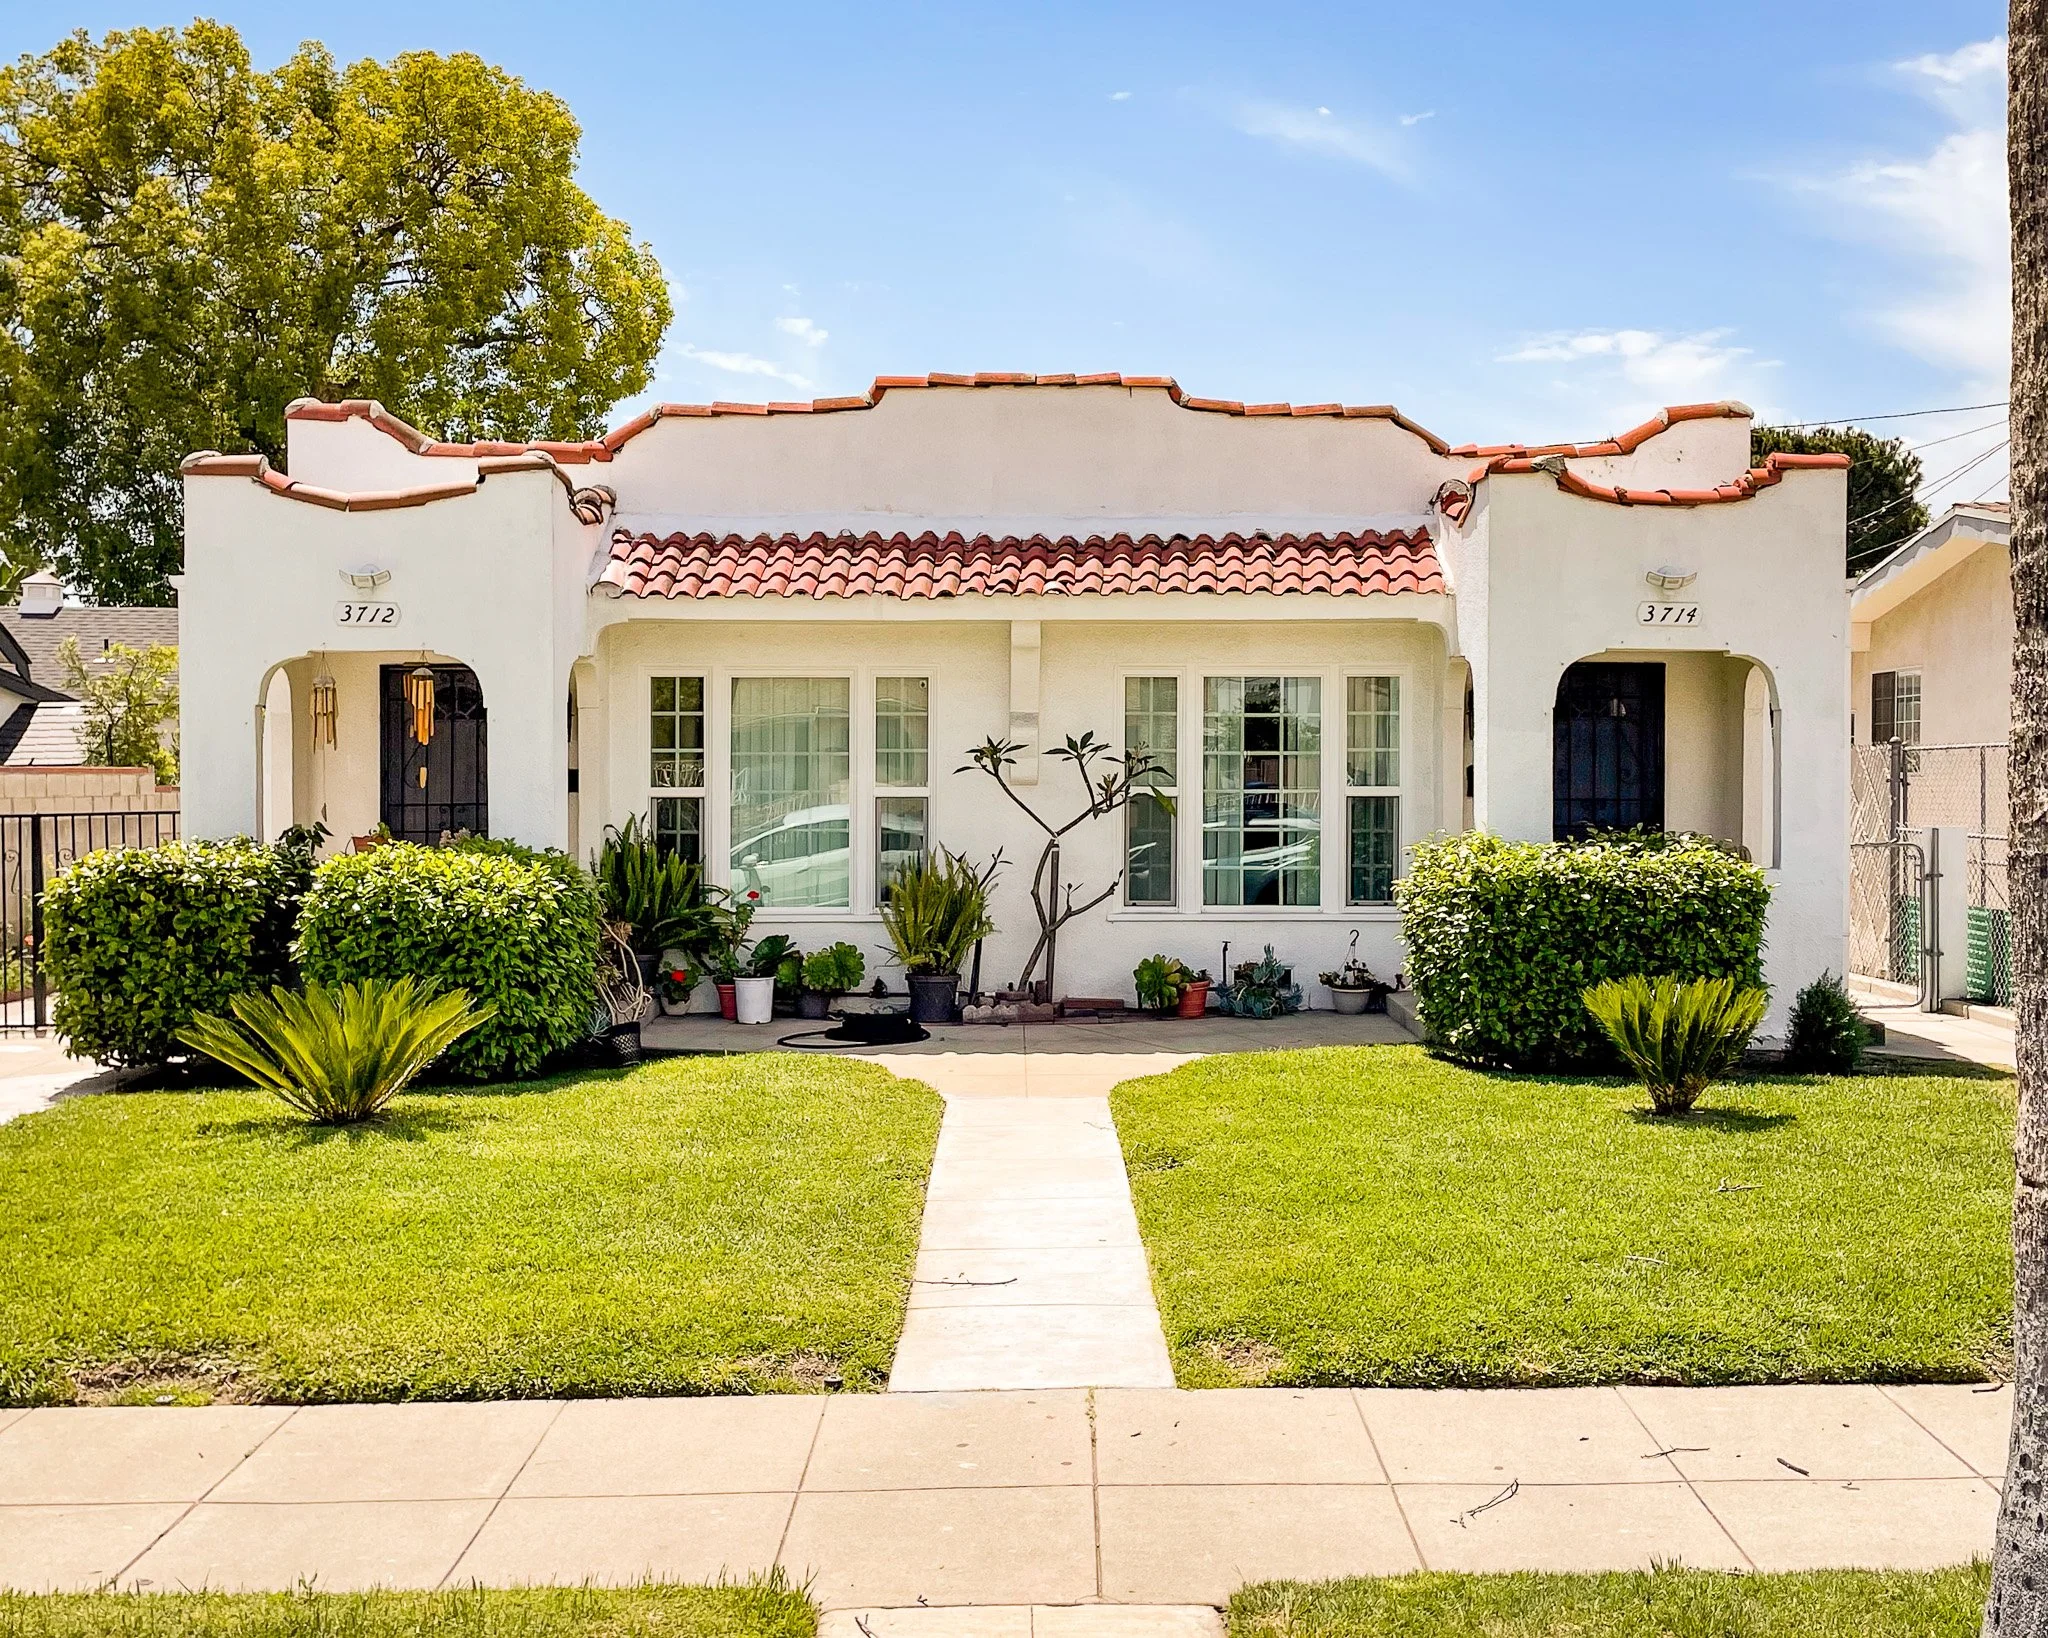
Fill the frame and activate your corners. This pretty ordinary photo of a cute little duplex has a nice tree in the upper left corner, a palm tree on the right edge, and the sidewalk along the bottom edge, which give your eye something to take in as they travel around the photo. Power lines, utility poles, trees, and streetlights are your friends here!
Shoot a little wide so you have some cropping and editing flexibility later.


Use the rule of thirds.


When you shoot matters, too.
Weather, season, and time of day will affect how people emotionally relate to your images. If you want to make something look good, shoot it at golden hour on a partly-cloudy day in spring, summer, or fall. If you want to make it look bad, shoot it at noon on a sunny day in winter. If you want to create a document of a building’s architecture, shoot on a cloudy day.
Our job for now: go make some photos of a building.
Part 2: Editing
Editing Tools: Lightroom Mobile
The goal here: correct for the technical limitations of the camera and make the photo look like what you saw with your eyes.
Non-Destructive Editing applies adjustments to an image without altering the underlying file.
Exposure Adjustments
The goal here is to have detail in the shadows and avoid blown-out white in the highlights.
In general, bring up shadows, bring down blacks, add a little contrast, and maybe bump up exposure.
Color Adjustments
White Balance is the most important thing to know. You will almost certainly want to warm your photos up a little to make them look more glamorous and inviting. It is easy to go too far here, and the auto white balance tends to overcorrect toward warm green images. Trust your judgment and try to make it look like what you saw with your eyes.
Vibrance and Saturation are often worth bumping up, but don’t go overboard.
Effects
Dehaze is an incredibly good tool for outdoor photography. Play with it and see what it does.
Vignette is easy to overdo, but a -10 often makes your pictures look a little cozy.
Cropping and Geometry Corrections
The Lightroom Upright tool is incredibly powerful!