Red Curb Starter Kit

If I were living in a dysfunctional city with a municipal government that was paralyzed by self-imposed public outreach requirements for every city action, no matter how small, I might get frustrated enough to partake in some light tactical urbanism.

I do not live in such a city, but if I did, these are the things I would need to, say, paint the curbs at bus stops red so people could board without having to squeeze between parked cars.

Anyway, I am glad I live in a city with a robust, well-functioning city government so I don’t have to resort to this kind of thing.

Some Thoughts On The Little Board/Downhill Slalom Setup Thing

The emergence of short, narrow, slalom-influenced downhill boards is a decisive break in downhill skateboard gear design, comparable to the short-board revolution in late 1960s surfing, the emergence of the double kick street skateboard in the early 1990s, or the introduction of the parabolic ski.

Advancements in riding technique and gear design, specifically around wheels and trucks, have come together to produce a radically new style of downhill racing skateboard. In the past, we had to choose between stability and responsiveness when selecting trucks, and between smooth slides and the ability to grip when choosing wheels. These performance trade-offs are no longer necessary.

This change began with improvements in wheel technology. In the early 2010s, fresh racing wheels tended to chatter violently when slid. Long wheelbases, dropped platforms, and wide trucks helped compensate for this tendency. Over the course of the decade, advancements in core design, urethane formulas, and lip profiles largely eliminated wheel chatter. Modern race wheels like Venom Magnums grip tenaciously, but nonetheless slide smoothly even when fresh, which made long wheelbases, lowered platforms, and wide trucks less necessary, allowing riders to experiment with shorter, narrower boards.

As boards got shorter and narrower, riders began experimenting with different trucks. This process began with split angle baseplates, which increase stability by making the back truck turn less than the front, and continued with tall bushings and the narrow truck trend I describe here. The truly radical break with traditional downhill truck design came when riders like Zak Maytum borrowed technology from slalom skateboards and began combining split angle baseplates with specific front and back hangers that had different geometry. Compared to the downhill trucks of the mid-2010s, these modern truck designs are astonishingly responsive, stable, and grippy.

As a result of these gear advances, downhill racing boards look nothing like they did ten years ago. In the absence of better, more accurate terminology, I call these shorter, narrower, slalom-influenced boards popular with racers “little boards” to differentiate them from longer, wider downhill boards currently popular with freeride skaters. (Those longer, wider freeride boards aren’t going anywhere. Little boards are great for hands-down style, but they’re not the best setups for standup-slide-heavy freeriding.)

Actually riding a good little board setup is, for lack of a better term, rad as hell. The simultaneous increase in grip, responsiveness, and stability feels like playing a video game with cheat codes enabled. Everything is easier, so you can skate harder and more confidently. I will always remember how utterly, irrepressibly, effusively stoked Cat O’Dell was after her first run down San Marcos Road on Aaron Breetwor’s well-tuned little board.

(This is mostly an article about gear, but a quick aside about riding technique: getting used to riding these new boards is kind of a head trip. A lot of the skills you develop riding a big board are required to compensate for your gear’s performance limitations: you figure out how to delicately feather in and out of slides, and how to lean hard into a corner, but not so hard that you oversteer and lose traction. All of that goes out the window with the little board. The more aggressively you ride a little board, the better it works. If you’ve been skating for years, it takes a little while to get used to.)

Unfortunately, building a good little board setup is extremely difficult due to the sensitivity of the steering and the outsize effects of even minor tweaks. A lot of people’s little-board setups ride like total garbage. These people are not bad skaters or incompetent skate mechanics. Little board setups are just hard to get right, especially if you don’t have easy access to a ton of parts.*

In the interest of saving everyone else a headache, here are some guidelines for setting up a little board:

  • Very narrow chopped downhill trucks do not ride the same as slalom-style trucks with dedicated front and rear hanger designs. If you’re going to do this, invest in some downhill slalom trucks. I personally ride Rogues. I hear great things about the Bear Smokies and lots of people like Don’t Trip trucks.

  • You cannot slowly transition from a freeride-style board by switching out one part at a time. If you’re going to switch to a little board, you need to get new trucks and a new deck all at once.

  • You want a relatively narrow, torsionally stiff deck with mellow concave and a wheelbase that puts your wheels under your feet at a shoulder width stance. Depending on your body size and proportions, this is likely between roughly 21 and 23 inches.

  • The importance of torsional stiffness cannot be overstated. I tried to run slalom trucks on a noodly maple/Formica deck that twists like crazy and it did not work well at all. Slalom boards turn almost entirely from the front truck. All your toeside turning and sliding leverage comes from your back foot. If your deck is not torsionally stiff, you will not be able to actually turn toeside. Spend the money and get a board with carbon fiber.

  • Mellow concave is also important. Many pros sand out the concave under their front heel and back toe to slightly dampen their steering.

  • You want your front truck around 53º and your back truck around 18-23º.

  • Try to match the height of your trucks. It’s ok if your back truck is slightly higher than the front. A higher front truck is nearly unrideable.

  • The front hanger should be equal width or narrower than the back hanger. On spaceable slalom Rogues, you want to run the front on the skinny setting and the back on the wide setting.
  • Pretty much everyone rides the stock Rogue slalom truck/2020 Bear Smokie bushing setup—73a/78a Venom HPF in the front truck, 95a/97a in the back truck—regardless of weight. I am a large man. I ride the same exact bushings as Aaron Breetwor, who is 100lbs lighter than me. I have no idea why this works and it has sent me down an intellectual rabbit hole regarding bushings, truck width, and rider weight. If you have thoughts, get in touch.

  • Almost all the pros use super-grippy aftermarket shoe soles to keep their feet planted. (I use Free Brake Soles, which I happily pay retail for.)

  • Second-generation coarse grip like Seismic Lokton or the forthcoming Venom grip is a must.

  • Most people with little boards that ride well have a foot stop and a foam tail wedge. I ride my foam wedge with the front lip about 1.5” in front of my inside back hardware. 

  • Unfortunately, there’s no way to build a good little board without spending the money on a set of CNC trucks and a carbon deck, but I think the performance benefit is well worth the initial expense.

If all of this sounds kind of intimidating and hard to figure out, that’s because it actually is intimidating and hard to figure out. To save you some time and headaches, here are a few deck and truck setups that Just Work Good:

  • MIDS Black Arrow, Rogue Slaloms (the 2020/21 all-gold models with the height matched 20º back baseplate), stock bushings, thin flat shock risers, torque block and foot stop to taste. This is what I and a bunch of friends ride.

  • The Comet Orbiter complete, as it comes from the factory.

  • Landyachtz Small Blind, Bear Smokies, stock bushings, thin flat risers, foot stop and torque block to taste.

This is not an exhaustive list by any means, and it’s solely intended to help people with a jumping-off point.

As a longtime stand up freeride guy who doesn’t really enjoy racing or pure speedboarding, I have to say it’s been a lot of fun to adapt my deep carving, slide-through-the-corners style to hands-down riding on a little board. Maybe it’s a product of getting older and lazier (those carve scrubs are a lot of work), but I’m skating as well as I ever have and enjoying it like crazy.

*I am a pretty good skateboard mechanic who had the personal assistance of Zak Maytum, arguably the best skateboard mechanic in the game, and even I had a lot of trouble figuring out how to make my first little board ride well. I spent the better part of what should have been a fun weekend struggling to make it down the hill on my board because, as it turned out, my back truck was too low and my foam wedge was in the wrong place. Stressing out about gear is not my idea of fun.

The Best Longboard Bearings are Zealous (But Bearings Don't Matter That Much)

The belief that high-end bearings will make you skate faster is widespread in skateboarding and longboarding.

This belief is wrong. As long as they are clean and lubricated, bearings do not make a significant difference in how fast your skateboard rolls.

Bearings with a higher ABEC rating won’t make you go faster because the ABEC rating scale was designed for industrial machines, not skateboards.

Ceramic bearings do not offer any meaningful performance benefits and actually wear out faster than steel bearings because the super-hard balls tend to dent the steel races when you do slides and ollies.

Those $40 Bronson bearings that come without shields may sound cool, but they are almost certainly slower than most other bearings and will wear out quickly because dirt and grime gets in easily. (You should not buy the $40 Bronsons, but if you do, I will make a couple dollars because that is an Amazon affiliate link.)

The best bearings for your longboard are $14/set Zealous Classics. Designed by an experienced downhill racer with built-in bearing spacers and speed rings, they are fast, cheap, durable, and convenient. Every top downhill racer who doesn’t get another brand of bearings for free rides them. If you want the mainstream brand name, Bones Race Reds are also great.

That said, I understand the desire to invest in new gear to improve your speeds and performance, so here’s how you can get the most bang for your buck:

  1. High quality wheels - $55-90 - If you want to make your board faster, the best use of your money by far is on new high-quality wheels made with fast, high-rebound urethane. Most low-cost complete boards come with wheels made from cheap urethane that rolls slow, like a flat tire. Changing them out for higher quality wheels from a reputable brand* will allow you to roll farther on every push and go faster down hills.

  2. Performance trucks with perfectly straight axles - $150-400 - Because aluminum shrinks as it cools, most cast trucks come out of the mold with slightly bent axles, and heavy riding tends to bend them further. Bent axles concentrate your weight on the inner lips of your wheels, which makes them slower, less grippy, and more prone to coning. Replacing cast trucks with forged or billet trucks that have precision axles will ensure the whole contact patch meets the ground, which will make your board roll faster and grip harder. Forged trucks Paris Savants and Bear Kodiaks run about $160, while billet trucks start around $350. (I ride Rogue Slaloms for downhill.)

  3. Tighter clothes - downhill racers and bicyclists wear tight clothes for a reason: the wind resistance from baggy street clothes slows you down a lot. Spandex may look a bit dorky, but it has real performance benefits, especially if you’re doing long distance riding.

  4. New or freshly-cleaned and lubricated bearings - if your bearings are crunchy, you can get a significant performance benefit from cleaning them or replacing them with a fresh set of inexpensive bearings like Zealous or Bones Reds.

  5. Expensive bearings - if you’ve already done everything else to your board and setup and you’re still not rolling fast enough, it might be worth spending the extra money for high-end bearings.

This isn’t to say you can never realize performance gains from high end bearings—slalom riders might shave a couple thousandths of a second off their times by switching lubes or whatever—only that there are a lot of gear and technique changes to make before they become relevant.

PS: fraud is rampant in the bearing industry. Unscrupulous factories are happy to stamp “ABEC 9” on the shield of any cheap bearing and bootleg Bones Swiss are readily available on sites like AliExpress for $4/set. If you’re going to shell out for Bones Swiss, buy them direct from Skate One or an authorized dealer.

*I mostly ride 78mm 74a Venom Magnums. Other good brands include Hawgs, Orangatang, Cuei, and Powell Peralta.

I'm running for the International Downhill Federation board

I’m running for the International Downhill Federation’s board of directors as the public relations lead.

For those who aren’t super familiar with my career, I have 11 years of professional experience in downhill skateboarding as a photographer, videographer, writer, marketing person, and sponsored rider

On the publishing side, I co-founded Skate House Media and was a staff writer and photographer at SkateSlate Longboarding magazine. On the brand side, I have shot photos and video for dozens of brands as a freelancer and worked for Madrid, Venom, and Comet as a staff photographer and marketing manager.

I’m running as part of the Global Gravity Association slate. You can read about our larger vision for the future of the IDF–which we want to rename the Global Gravity Association to prevent confusion with the Israeli Defense Force–on the GGA website.

My personal vision for the public relations role is rooted in an understanding that downhill skateboarding, luge, and other gravity sports are niche interests, not global spectator sports. As such, the main purpose of the IDF/GGA public relations is to communicate with its membership. I have some specific plans to improve that communication.

Throughout the course of the year, IDF/GGA members should know what the organization’s leaders are doing and why; so I will publish regular updates on the board’s work and establish a formal communication channel so members can get timely responses to any questions they have for the board.

On event weekends, riders and fans should know what’s going on at the hill. To that end, I will develop a standardized procedure for event communications so nobody has to wonder when practice starts, what time racing is happening, or where they need to go to check the live brackets or find the video feed.

While I do not expect to be on the ground making media at many events, I am eager to share the lessons I’ve learned from 10 years of photographing downhill racing with the world. I will work with Tyler Topping, our media coordinator, to create a guidebook for event media coverage. If there is interest, I will also do a recorded web version of the “how to take good skate photos” talks I gave at events in 2019.

To aid event announcers and outside media, I am going to work with Brian Cortright, our web developer, to start collecting biographical information on event registration forms and the IDF/GGA website.

Broadly, my goal here is to set up durable systems and develop institutional capacity to help the IDF/GGA serve its membership long into the future. I am hoping to serve for a single term to get things set up and running, then hand the role over to someone else (ideally a woman, an lgbt person, and/or a person of color).

Voting starts on January 21st and runs for 48 hours on the IDF website.

These Are The Standard Skateboard Nut and Bolt Sizes

Skateboards use standard, off-the-shelf hardware. You can save money by buying it in bulk from somewhere like McMaster-Carr or your local hardware store* instead of paying skate shop markups. Here are the standard hardware-store sizes.

Axles take 5/16”-24 nylock jam nuts. If you have precision trucks like Rogues, you may want the taller standard nuts.

Kingpins take 3/8”-24 nylock jam nuts. Bushings have a standard 1” outer diameter, so you’ll want these flat washers.

Mounting hardware is 10-32. You can get bolts in various lengths and styles (street skateboards generally take flat head 7/8” without risers or 1” with risers, while longboards use 1 1/4” or longer, depending on risers). The nuts are standard lock nuts.

*Most hardware stores keep 10-32 hardware in stock, but you’ll probably have to special order axle nuts and kingpin nuts. Also, while home improvement stores like Home Depot and Lowe’s sell hardware, they are not hardware stores. They generally charge much higher prices for fasteners and sell them in smaller quantities, so it’s worth checking out your local Ace Hardware or a comparable store.

What Are The Best Knee Pads For Longboarding and Downhill?

Updated August 2021

“Which knee pads are good for downhill skateboarding” is one of the most frequently-asked questions in downhill Facebook groups.

I don’t need much from my pads. They just need to actually protect my knees when I fall, be reasonably comfortable to wear, and last through more than a few crashes. This combination of features has proven surprisingly hard to find.

The available options break down into roughly three categories: very low profile pads made with dense non-Newtonian foam that hardens on impact (G-Forms), “vert” style hard-cap knee pads that are designed for ramp and bowl skating, and more-substantial non-Newtonian pads built for mountain biking or snowboarding. I personally believe that mountain bike and snowboard pads provide the best protection of all the three.

Very low profile pads consist of a roughly 3/8” thick polyurethane pad glued and sewn to a thin lycra sleeve. I am not a fan of this style of pads because they do not actually protect you from impacts or abrasions and tend to get ruined the first time you fall on them. Some years ago I got a pair from the leading brand for free, wore them under sturdy pants, and nonetheless lost a chunk of my knee the first time I fell in them. While I was bummed about the hole in my knee, I would have been considerably more bummed if I had paid the $60 retail price because the pad itself was completely shredded. While this type of pad is theoretically better than nothing and might be good for other applications, I think they simply aren’t durable or protective enough for downhill skateboarding.

The leading brand of very-low-profile pads is G-Form ($59), which also makes a newer “Rugged” version ($79) with a textile covering on the foam. Demon makes a slightly less expensive version, which they call the “Smartskin D3o" ($39). TSG’s version ($59) features a back of the knee cutout and some additional padding.

note: these are Amazon Affiliate links. I will make a small commission off each sale if you make a purchase after clicking them.

Hard cap “vert” style pads like 187 Pros ($99), while great for transition, are not designed for downhill and tend to fail in downhill crashes. The caps, which slide easily over smooth concrete and wood skatepark surfaces, often catch on asphalt and pull the pad down due to insufficient elastic at the top, exposing your bare knee to the pavement, and the lower straps frequently shred during low-sides. While they’re not all bad–Smith Scabs ($69, nice) have worked well for me thanks to their stiff, adjustable top strap and riveted-on cap and some guys swear by the lower-profile 187 Fly kneepads ($35)–I don’t love hard caps because they’re quite bulky and knee sliding at high speed is a great way to smack into a guard rail, a tree, or an oncoming car.

A notable exception here is the Kevin Reimer-designed TSG DHP (€120), a hard cap pad specifically designed for downhill. It features low profile padding, extended caps to cover high-wear areas that typically shred on vert pads, and beefy straps. While I have never personally tried them (I am not a knee slide guy), Kevin is an excellent product designer and I hear great things. Note that these are expensive and often available exclusively from the manufacturer. June 2021: update: they are in-stock at Muir Skate here and also Amazon.

In my experience, the best knee pads for downhill skating are d3o mountain bike/snowboard pads. Similar to the knee pads in modern racing leathers, I find this style to be an ideal balance between bulk, flexibility, and protection: they fit under my pants, protected my knees when low-siding on hands-down slides, and did their job on a brutal stand-up high side to knee bash. In a word, they are trustworthy.

Before I switched to wearing leathers full-time, I wore Demon Hyper Knee x D3o ($59) pads that featured a kevlar-covered d3o main pad stitched to a pull-on neoprene sleeve, with a few additional smaller pads to protect the sides of the knee. After riding the same pair for about two years, they proved durable, affordable, comfortable, and protective. There are similar models from TSG ($59), POC ($119), Fox Racing ($74), DaKine ($89), IXS ($115, available in kids sizes), and other brands with various strap and vent configurations.

The weak point was the kevlar on the knee, which ripped during a low-side crash; but that was easy enough to fix*.

Newer models add a molded plastic cap on the outside of the knee for impact protection and durability, but tend to cost about twice as much. Options include the TSG Patrol A ($129, which I have tested myself and found to be excellent), TSG Tahoe Cap ($129, similar to the Patrol A, but built on a pull-on sleeve instead of with wrap-around straps), Fox Racing Launch ($129), POC VPD System Lite ($129), G-Form E Line ($110, with a zip sleeve and wrap around straps), and the DaKine Mayhem ($109).

(Though superficially similar, Sector 9 Gaskets do not have the same d3o padding and durable fabrics as mountain bike pads. I got a pair for free and much preferred the Demon pads.)

All Around Best: TSG Tahoe Cap

Best Value: Demon Hyper Knee X D3o

Best for knee-sliders: TSG DHP

*Bish’s tear mender is an incredibly effective latex-based fabric glue that makes patching cloth or leather easy, quick, and fast. I cannot recommend it highly enough.)

How to Paint Your Full Face Helmet

Updated 4/21/20

Skateboarding is roughly 80% about looking cool, and a custom painted helmet looks at least 73% cooler than a stock color; so in the interest of helping everyone stand out on the hill, here’s a guide on how to paint your helmet.

Some notes before we go into this: a good paint job is all about being patient, following the directions on the can, and thorough prep work and finishing. You’re going to spend a few minutes painting and a lot of time sanding, waiting for things to dry, and polishing. The more patient and thorough you are, the better your helmet is gonna come out. Expect your helmet to be out of commission for at least a week.

WHAT YOU’LL NEED (these are Amazon affiliate links)

  • A full face helmet.

  • Waterproof sandpaper in 220, 400, 800, 1000, 1500, 2000, and 2500 grit. (Grits over 400 are optional)

  • A bowl or bucket of warm, soapy water.

  • Blue painters tape.

  • Primer, paint, and clear coat. You have two basic options here, which can be described as hardware store or auto supply store.

    • Hardware store paint is cheaper and easier to work with. Grab some gray primer and pick a paint color you vibe with. Don’t worry about the finish of your paint, because you’re going to be using a glossy clear coat to finish. I linked Rust-Oleum products here because you should be able to find them in any hardware store and I have had good results with them in the past. If you want a wider color selection, Montana makes artist-grade acrylic spray paints in hundreds of shades.

    • Car and motorcycle paint is a little more expensive, a little more delicate to work with, but tends to deliver better results. You’re going to use a plain gray primer and pick a paint color you like. For clear, Zak Maytum recommended 2K clear glamour spray, a two-part automotive clear that comes in a rattle can, and it is BY FAR the best clear I have ever used.

  • Somewhere to paint that is well-ventilated and within the temperature and humidity guidelines set out on your paint cans. Please be aware that 2K overspray will stick to whatever is nearby. Don’t be an idiot and spray near your car like I did (it will come off with a clay bar).

  • Plenty of patience.

  • Rubbing and polishing compounds and car wax. (Optional)

  • Door edge trim. I use black; but it’s also available in chrome and fake carbon fiber.

  • Tack cloths or clean rags (old t-shirts or underwear works well)

  • Optional: a hair dryer and a cardboard box big enough to fit your helmet.

Ok, got all your supplies? Let’s go.

  1. First, take apart your helmet. Pull off all the stickers and remove the adhesive (a hairdryer will make this easier). Remove the visor and all removable hardware. (Put the visor hardware in a plastic bag in a safe place, because it’s usually custom and hard to replace.) Pull out the cheek pads and, if possible, the cloth liner over the eps foam.

  2. Pull off the rubbery trim around the bottom edge and the face opening. A hairdryer will help loosen up the glue and soften the vinyl. Don’t worry about messing it up because you’re going to throw it away and replace it with door edge protector. A razor will help shave all the residue off.

  3. Use your blue painter’s tape to mask off the entire interior of the helmet. The solvents in spray paint can melt the foam that protects your brain; so do a good job here.

  4. Using your 220 grit sandpaper and your bowl of soapy water, wet sand off the original paint and primer, ideally down to where the fiberglass is starting to show through the stock primer. Don’t go very deep into the fiberglass, as you don’t want to damage the structural soundness of your helmet or deal with itchy fiberglass dust.

  5. Wet sand with your 400 grit sandpaper to smooth out the surface, remove sandpaper scratches, and get it ready for paint.

  6. Clean all the dust off your helmet by running it under the faucet, then let it dry (don’t worry, water won’t hurt your foam or the structural integrity of your helmet). When it’s dry, wipe it down again with a tack cloth or a clean, damp rag. You want to make sure it’s completely free of dust. Your helmet should have a smooth, matte finish at this point. You can see a pic of how it should look down below.

  7. Fill out the face hole of your helmet with paper to prevent overspray from hitting the inside of your helmet. Stuffing a paper grocery bag inside will usually do the trick here.

  8. Read the instructions on your primer, paint, and clear coat cans, then check the manufacturers’ websites for their technical data sheets. You are going to actually follow these directions, which might be the hardest part of this whole process.

  9. Lay down your primer. Follow the directions on the can about shaking the can for at least a minute, holding the can about 16” away from the surface, and applying light, even coats. I cannot stress the light, even coats thing enough.

    Less is more here. You probably won’t get full coverage on your first coat. Don’t slop a ton of paint or primer on there at once or you’ll get drips, it’ll never dry, and your finished product will look bad. Painting from the bottom of your helmet up will help avoid runs and drips.

  10. Let your primer dry completely. This can take up to several days, depending on temperature, humidity, and the thickness of your coats. Check your can to see the dry and recoat times. Your primer is dry when you cannot dent the finish with your fingernail or smell solvents gassing off.

    1. You can use your cardboard box and hairdryer to create a low-tech convection oven for faster drying in between coats. Just take your cardboard box and cut a 3” hole in the top of it and another hole in the side to fit the business end of your hairdryer. Stick your helmet in the box, insert the hairdryer in the appropriate hole, and turn it on (ideally at lower temperature). The heat and constantly moving air will help your paint dry faster. Note that you will want to keep a close eye on this to avoid burning down your house. (The hole in the top of the box is critical to aid convection and allow your solvent fumes to escape.) Alternately, you can just set your helmet in front of a fan.

  11. Once your primer is dry, wet sand it smooth with your 400 grit sandpaper. You’re not trying to remove a lot of material, you’re just slightly roughing it up so paint will go down smooth. When you’re done, grab a tack cloth or a couple damp rags to wipe your helmet down and make sure it’s totally dust-free. When it’s clean, smooth, and completely dry, it’s time to paint.

  12. Spray your first couple coats of paint. Once again, shake your paint for a couple minutes to make sure it’s properly mixed and apply light, even coats from the bottom up. Follow the directions for dry and recoat times.

  13. Let your paint dry completely.

  14. If you haven’t gotten total coverage, lay down another two or three coats of paint. Light or very bright colors will take more coats than darker colors to get good coverage. Metallics cover best. Neon yellow is going to require a lot more coats than flat black.

  15. Let your paint dry completely again. Seriously, this is important.

  16. When your paint is looking good, it’s time for clear coat. This is where you’ll make or break your final product; so follow the directions on your can and again, be sure to do light even coats from the bottom up.

  17. Let that clear dry. (If you’re using 2K clear, you can throw your helmet in your low-tech convection oven to fully cure each coat in about an hour.)

  18. More clear. Deep, flawless clear coat is the secret to making your paint job look fly; so feel free to do several layers. Just make sure your helmet is clean between coats.

  19. Again, let your clear dry completely. (It can take up to a couple weeks for thick coats of hardware-store clear to cure completely.) You’ll know it’s done when the clear is very hard and your helmet doesn’t smell like paint anymore.

  20. Lightly sand your whole helmet smooth with 400 grit sandpaper to remove any orange-peel texture. You’re not trying to go super deep here, just to smooth things out so your final coat will go down nice and smooth.

  21. Lay down a final coat of clear.

  22. Remove all the masking tape and the face-hole covering.

  23. The following steps are optional and should only be followed if you’ve used 2K clear. If you’re happy with how your finish looks, you can skip to reassembling your helmet. If you want a helmet that has a perfect, mirror-smooth finish, keep going. These steps will make solid colors look extra professional; but will slightly dull the shine of glitter or exposed carbon.

    1. Wet sand with your 800 grit sandpaper. When it feels completely smooth, move on to 1000 grit, then 1500, 2000, and 2500 in sequence. You’ll know when it’s time to step your grit up.

    2. Again, clean off all your dust.

    3. Following the directions on the package, treat your helmet with rubbing compound, let it dry, and buff with a clean cloth.

      1. Less is more here. The package you bought is probably enough to do two or three whole cars. You want a slight haze.

    4. Apply your polishing compound, let it dry, and buff with a clean cloth.

    5. Finally, apply wax, let dry, and buff with a clean cloth. Your helmet should be wildly shiny by now.

  24. Replace the edge trims with door edge guard. A hair dryer or heat gun will help it bend into place in the visor opening.

  25. Put your visor back on.

  26. Take a picture and put it on social media to stunt on your friends and/or haters.

  27. Whack your perfectly painted against the ground to get the curse off. (This is important: failure to remove the curse is likely to result in horrific slams.)

  28. Skate.

Additional notes:

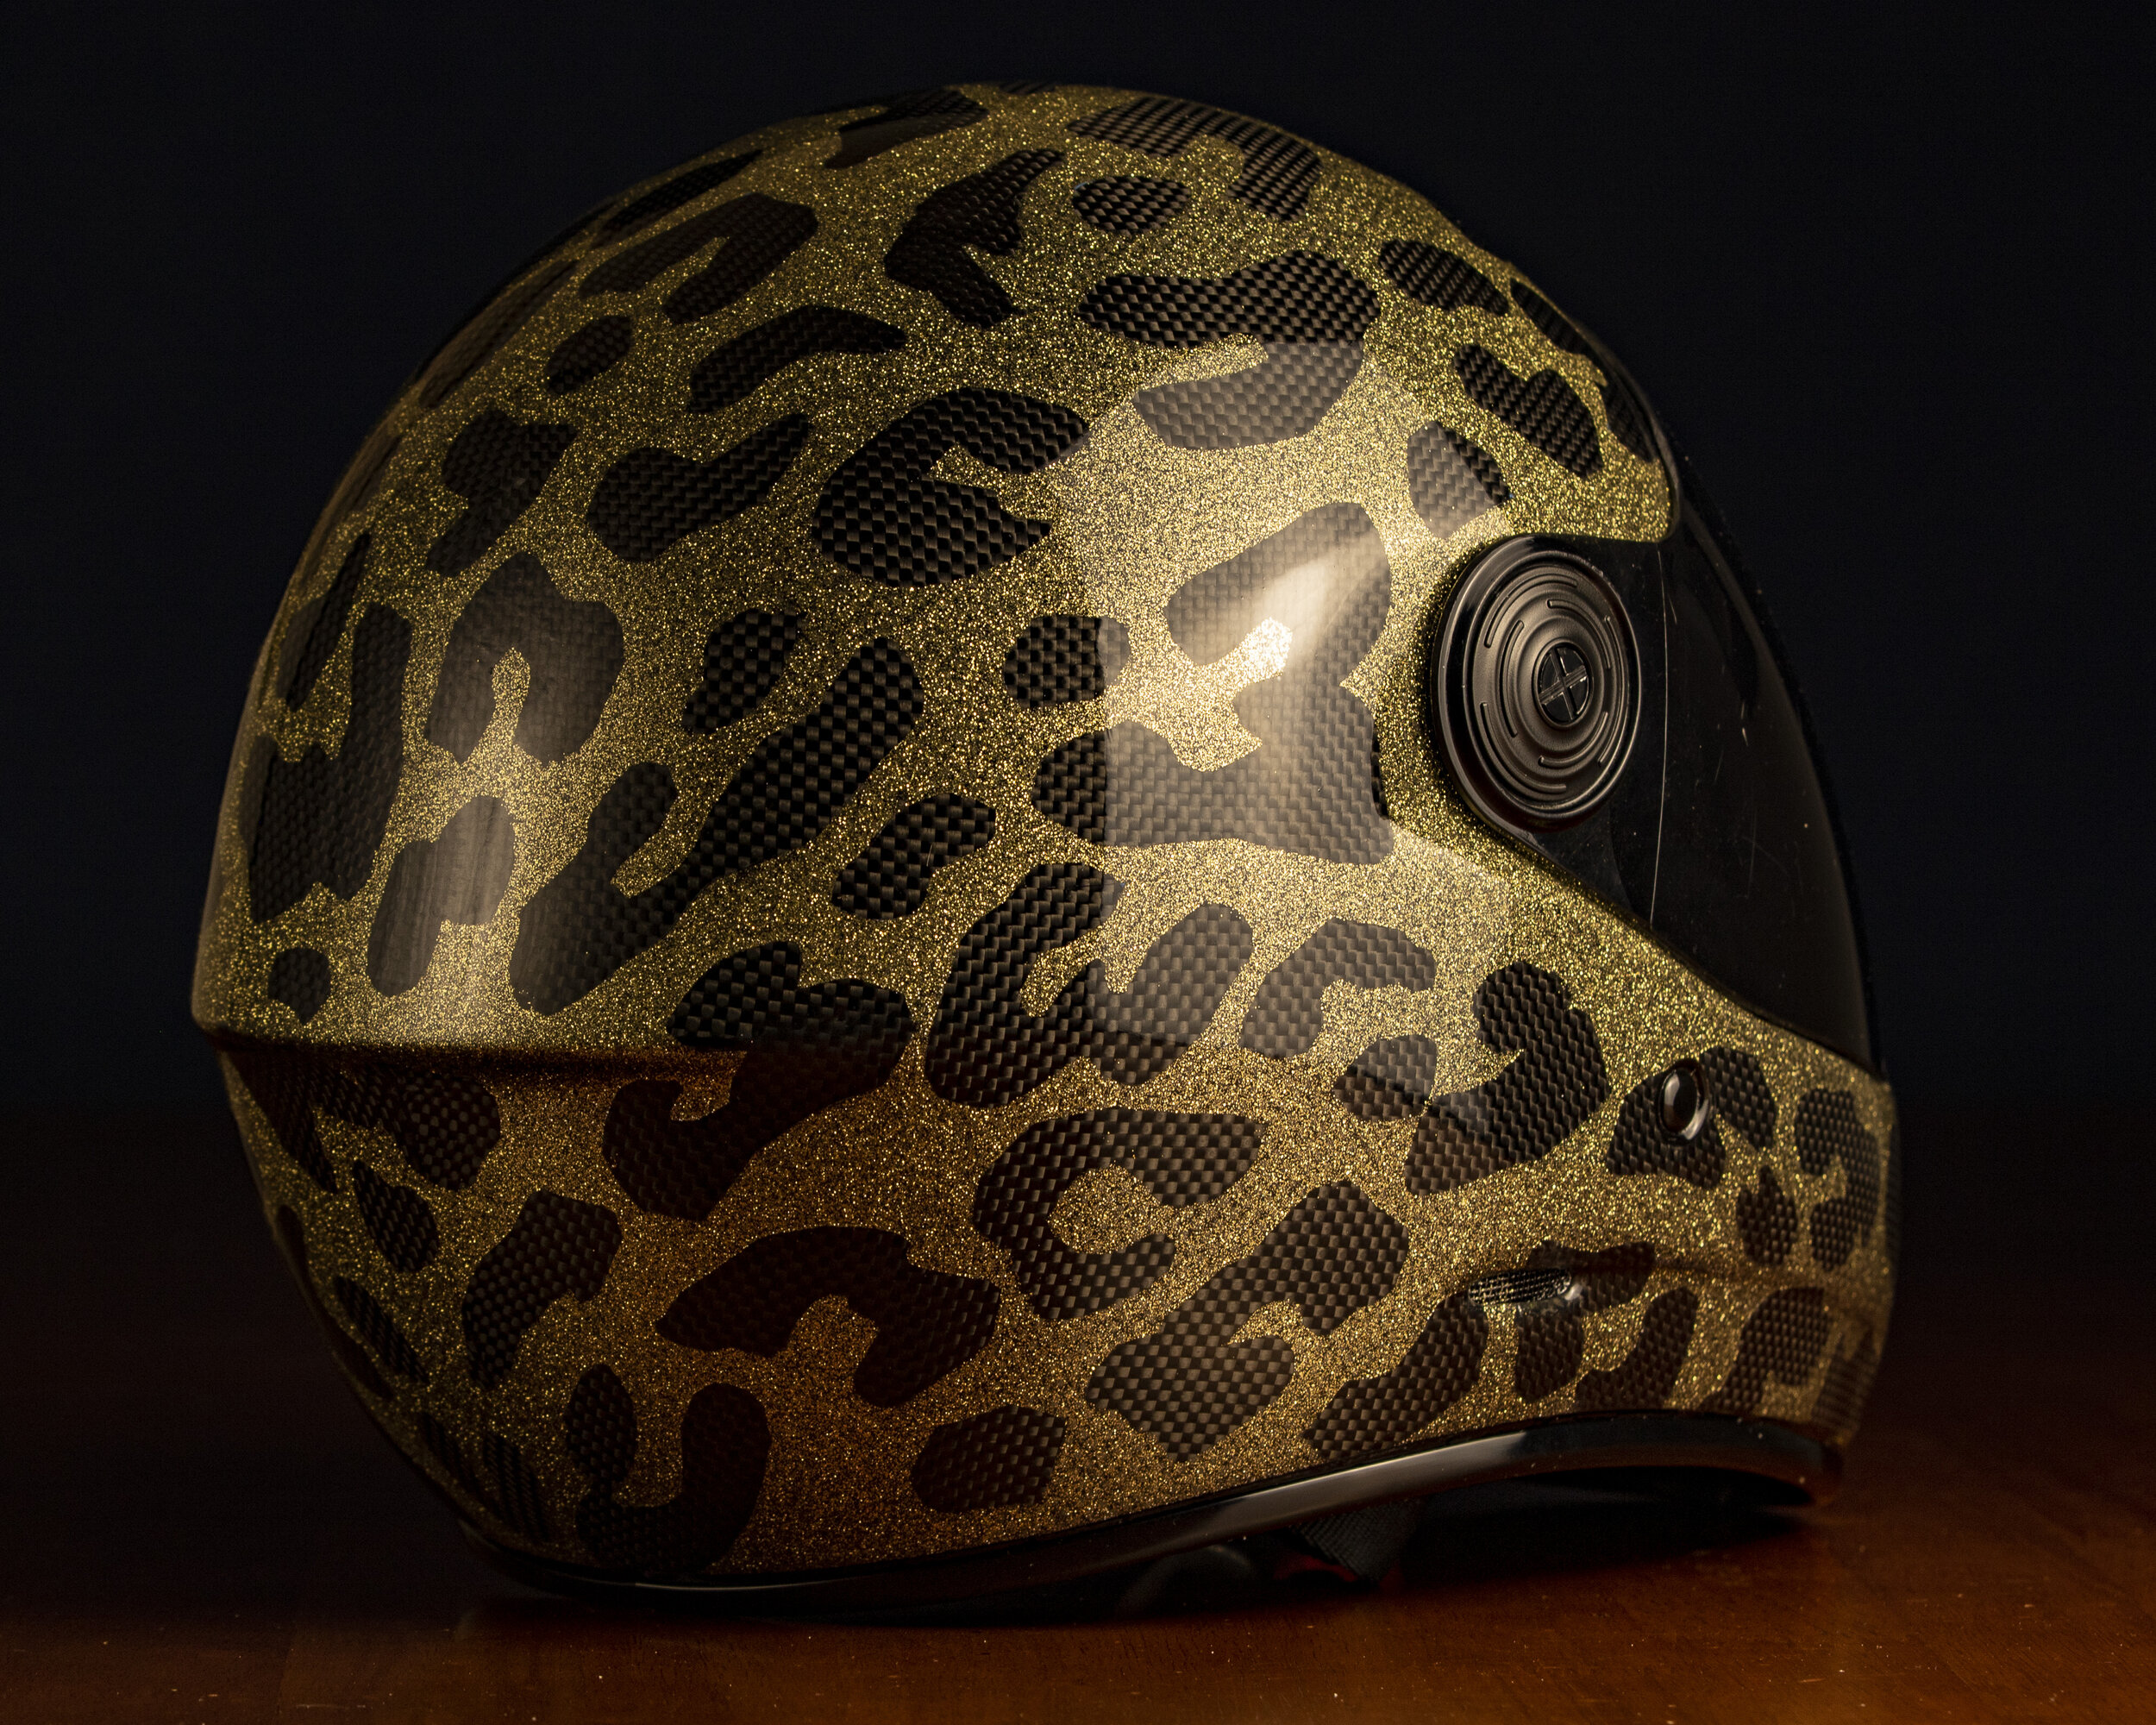
  • If you want to do a glitter look like my helmet, expect to use lots of clear to build it up enough to fully bury the glitter in clear. I went through one and a half cans of 2K to get the clear deep enough to smooth out the glitter and non-glitter sections.

  • If you’re doing exposed carbon or the glitter look, skip the final wet sanding and polishing and just do a heavy coat of 2K after your final wet-sanding.

Process Photos:

(Pics will be updated as I finish this ongoing project.)

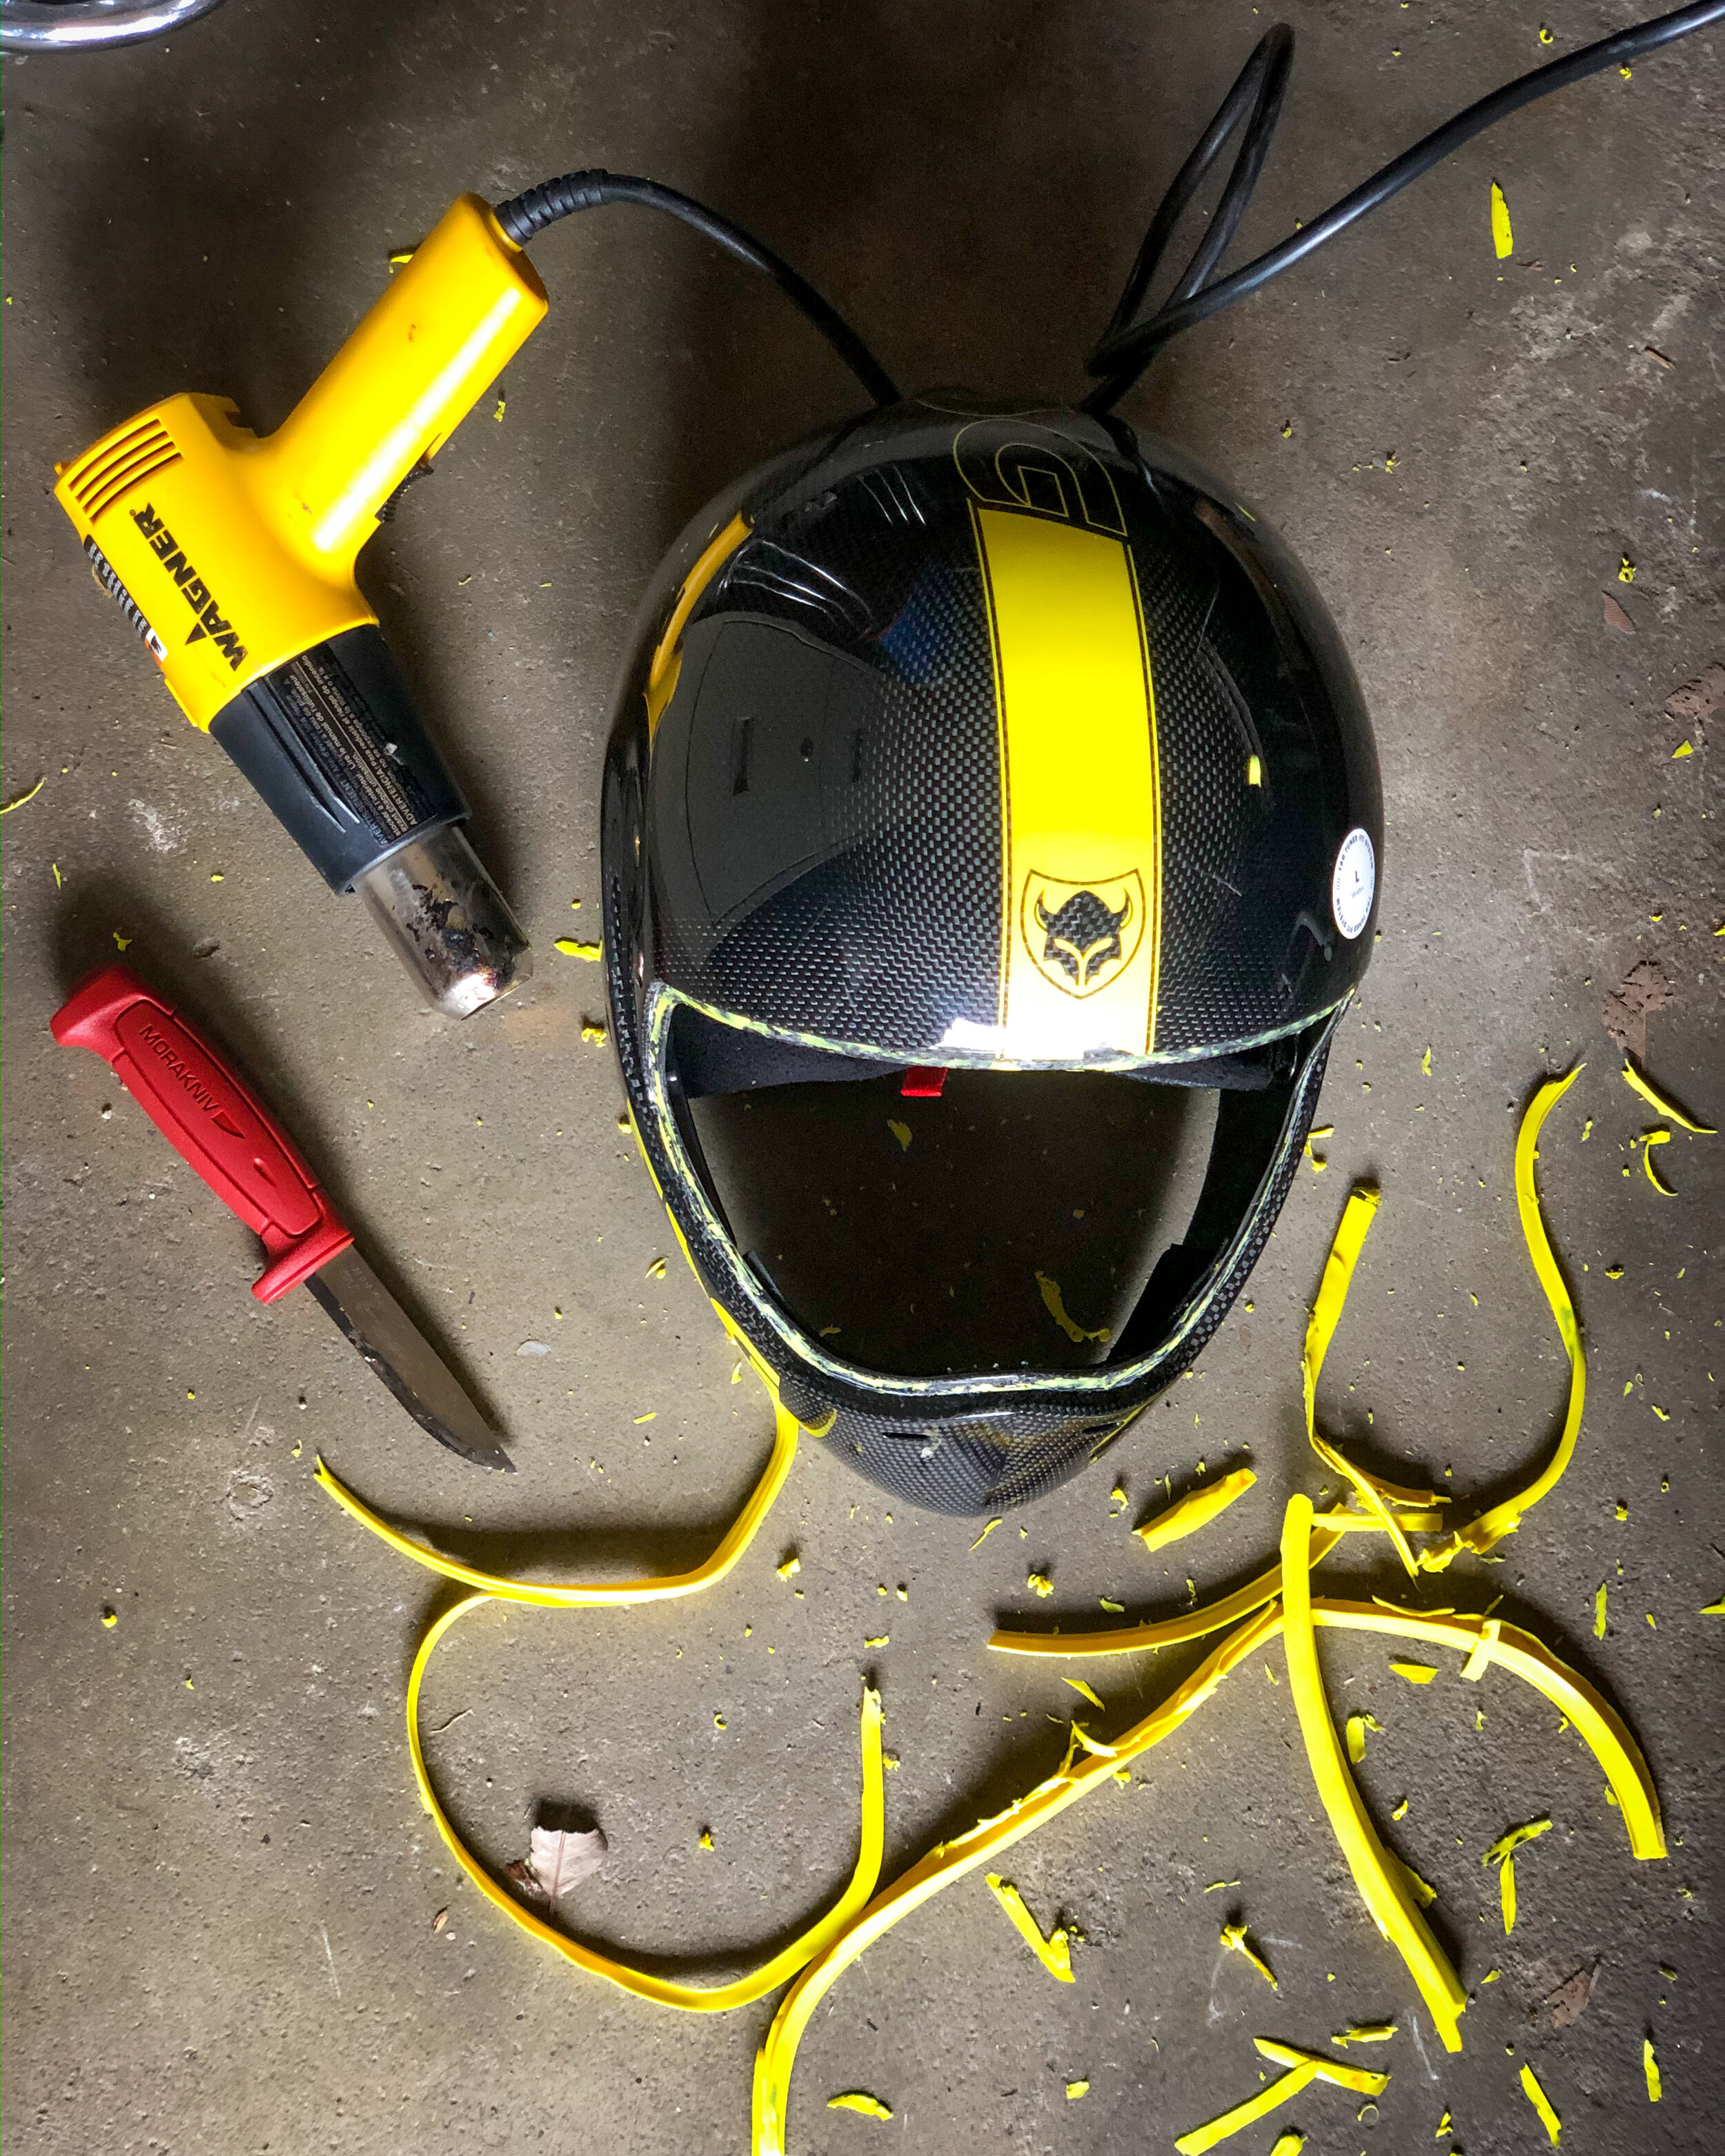
Visor off, hardware securely stored, trim removed with a heat gun and a sharp knife. The TSG Pass Pro Carbon trim is very stubborn and does not like to come off. In retrospect, I should have worked harder to get this off completely. I ended up havin…

Visor off, hardware securely stored, trim removed with a heat gun and a sharp knife. The TSG Pass Pro Carbon trim is very stubborn and does not like to come off. In retrospect, I should have worked harder to get this off completely. I ended up having to paint the remaining vinyl bits black.

Here’s what the helmet looks like with the graphics sanded off and the whole surface wet-sanded with 400 grit. Note the smooth, matte finish with no sandpaper scratches.

Here’s what the helmet looks like with the graphics sanded off and the whole surface wet-sanded with 400 grit. Note the smooth, matte finish with no sandpaper scratches.

Before paint texture close up. I actually sanded a bit more to take out these scratches before painting.

Before paint texture close up. I actually sanded a bit more to take out these scratches before painting.

Taped off interior to protect the foam from harmful paint solvents.

Taped off interior to protect the foam from harmful paint solvents.

Ready for paint. Note the covered face hole and the taped-off visor hardware area. The additional tape is to create a leopard print pattern, where the leopard spots are exposed carbon fiber weave. The helmet is sitting on a light stand with a coffee…

Ready for paint. Note the covered face hole and the taped-off visor hardware area. The additional tape is to create a leopard print pattern, where the leopard spots are exposed carbon fiber weave. The helmet is sitting on a light stand with a coffee can on the end of it.

After the gold glitter spray. Remember: use light, even coats for a nice finish.

After the gold glitter spray. Remember: use light, even coats for a nice finish.

Tape removed. Note the thickness of the glitter and its relative dullness here: we’re going to have to build up enough coats of clear to fully bury the glitter (for maximum sparkle) and even out the depth between the exposed carbon and the glitter.

Tape removed. Note the thickness of the glitter and its relative dullness here: we’re going to have to build up enough coats of clear to fully bury the glitter (for maximum sparkle) and even out the depth between the exposed carbon and the glitter.

The carbon looks great after the first coat of clear; but it’s going to take several more coats to bury the glitter and make a smooth surface (note the texture on the nose). Sorry for the slightly blurry picture.

The carbon looks great after the first coat of clear; but it’s going to take several more coats to bury the glitter and make a smooth surface (note the texture on the nose). Sorry for the slightly blurry picture.

Once enough clear has been built up, I gave it a final wet sand at 400 grit. Note how the surface height difference between the glitter and the carbon is gone.

Once enough clear has been built up, I gave it a final wet sand at 400 grit. Note how the surface height difference between the glitter and the carbon is gone.

This is the surface after wet-sanding the clear to 2500 grit. Note the ugly vinyl residue and that the perfect, mirror smooth surface has come at the cost of slightly dulling the sparkle of the glitter and the “deep” look of the carbon. Rubbing comp…

This is the surface after wet-sanding the clear to 2500 grit. Note the ugly vinyl residue and that the perfect, mirror smooth surface has come at the cost of slightly dulling the sparkle of the glitter and the “deep” look of the carbon. Rubbing compound, polish, and wax restored the gloss; but the dullness of the glitter and carbon persisted. I had to do something about the ugly yellow trim residue anyway; so I wet- sanded the whole helmet with 400 grit again, painted over the trim residue with black primer, and sprayed final coat of clear, which restored the brilliance.

To get the perfect circle for the strap rivet, I put a piece of masking tape on a cutting board, then carefully traced around the cap of a marker with an x-acto knife.If I had a do-over, I would have spent more time getting the trim off completely a…

To get the perfect circle for the strap rivet, I put a piece of masking tape on a cutting board, then carefully traced around the cap of a marker with an x-acto knife.

If I had a do-over, I would have spent more time getting the trim off completely and painted it at the start of the process. I’ll do it better next time.

Finished and reassembled. The final clear has a very slight orange peel; but the glitter sparkles bright and the carbon looks great.

6 Things Men In Skateboarding Need To Stop Doing

Note: I published this on SkateHouseMedia.com in 2016, a week after a woman skateboarder published an article called “6 Things Women In Skateboarding Need To Stop Doing” on Concrete Wave’s website. I am republishing it here.

As someone who loves skateboarding and wants to see everyone enjoy it, this week’s online gender wars have bummed me out. The subculture of skateboarding is overwhelmingly male-dominated and male-identified; so instead of yelling at women and explaining how they are Doing It Wrong, I decided to flip it around and come up with a few things men can stop doing to make skateboarding more welcoming to women. (Listicles are so hot right now.)

If you’re a dude who wants more women to skateboard, stop doing this shit:

  1. Using gendered language to insult each other.
    If someone is skating slow and being a coward, find a more creative way to call them out than “don’t be such a pussy” or “stop being a bitch.” A pussy takes a pounding and spits out people. Testicles take the slightest tap and run back into your pelvis to hide. Be a pussy, not a testicle.

  2. Objectifying women in skateboard media and marketing materials.
    I know the hormonal adolescent straight boys love to see a scantily clad woman next to a skateboard product, but that kind of ad is lazy, boring, uncreative, and subtly perpetuates the idea that skateboarding is for [straight] men only*. If you’re going to sponsor a conventionally attractive woman skateboarder and put her in an ad, at least show her actually skating in that bikini.

  3. Making sweeping generalizations about women skateboarders.
    Male skateboarders get to be judged as individuals. Women who shred are always held up as representatives of women’s skateboarding as a whole and expected to have opinions about Women In Skateboarding. That’s a sexist double standard.

  4. Downplaying women’s accomplishments because of their gender.
    She got sponsored because the company thought she’d help sell boards. The fact that I still get free gear is proof that sponsorship isn’t always about who’s the gnarliest skateboarder. And while we’re being real, yeah, looks matter, even for dudes. Maybe you would get that sponsorship if you stepped up your social media game, got a haircut, joined a gym and stopped dressing like shit so you looked presentable on camera.

  5. Imposing male-dominated, gendered expectations on women’s skating.
    Just as ceramics, watercolor, and other feminine-identified art forms are equally as valuable as masculine-identified forms like oil painting, architecture, and sculpture, flatland freestyle and cross stepping is just as valid a kind of skateboarding as downhill and freeriding. This more delicate and graceful kind of skateboarding is extremely difficult to master and execute well, even if the consequences of error aren’t life threatening. There’s room for all styles of skating.

  6. Passing judgment on women’s clothing choices.
    Women are constantly scrutinized and judged on the clothing they wear: everything exists on a scale from slutty to frumpy and there’s no neutral t-shirt and jeans type outfit to fall back on. A girl in tight jeans and a fitted t shirt is showing off her body inappropriately. A girl in baggy jeans and an oversize t shirt looks like a dyke. They cannot win. And when it comes down to it, her denim daisy dukes are more practical for skating than your board shorts or mesh basketball shorts.

While there’s always more work to be done, I actually think we’re doing ok on the gender equality front, at least by the very low standards of the skateboard industry–there’s no longboard equivalent of Hubba wheels. Anyway, yeah. Go skate and try not to be a sexist creep. It really isn’t that hard.

Author’s Notes:
*Speaking from my outside perspective as a gay dude here, the whole “scantily clad woman with skateboard” thing is weird as hell. While I certainly enjoy looking at hot dudes,** the idea that a picture of some naked dude next to a skate product would inspire me to run out and buy that product is ridiculous to me. Like strip clubs, football, and cargo shorts, this is something I will never understand about straight culture.

**I’m not into scrawny 19 year olds, so most of y’all are not my type. But if you are my type, yeah, I’m totally checking you out.

An Industrial History of The Skateboard, Starting From The Very Beginning

  • Late Neolithic era: invention of the wheel.

  • 1800 BCE: Oldest known production of steel in Turkey.

  • 1600 BCE: (Shang Dynasty) Chinese artisans cast metal objects with clay molds.

  • 615BCE: Babylonian king Nabopolassar lays down the first asphalt road in the historical record.

  • 80AD: the Romans invent concrete and use it to build a series of structures that still stand today, notably the Pantheon and the Coliseum.

  • 476AD: the Roman empire falls. The recipe for Roman concrete is lost to the ages.

  • 1498: Leonardo Da Vinci describes an early ball bearing in his design for a helicopter. (More discussion of bearing history can be found here.)

  • 1540: Italian metallurgist Vannoccio Biringuccio describes sand casting metal objects in his metalworking manual De la pirotechnia.

  • 1735: Eccentric Belgian clockmaker and inventor John Joseph Merlin rides into a London party on his new wheeled shoes, which resembled inline skates. Unable to stop, he crashes into a mirror.

  • 1794: British inventor Philip Vaughan is awarded the first patent on the modern ball bearing design, which features balls that run in a groove around an axle assembly.

  • 1797: British naval engineer Samuel Bentham is awarded a patent for a veneer-cutting machine after inventing plywood.

  • Early 1800s: Standardization of screw threads begins in earnest.

  • 1819: John Loudon Macadam publishes “Remarks (or Observations) on the Present System of Roadmaking,” which describes a method for the construction of durable compacted gravel roads.

  • 1824: Joseph Aspdin receives a patent for Portland Cement, an early modern concrete.

  • 1855: The introduction of Henry Bessemer’s Bessemer Process makes the mass production of steel possible.

  • 1856: Henri-Etienne Sainte-Claire Deville opens the first industrial facility for the production of aluminum.

  • 1860s: Immanuel Nobel, discovers the superior strength of laminated plywood and invents the rotary lathe, a tool for cutting continuous veneers off a single log. (His son Alfred Nobel would later invent dynamite and establish the Nobel Prize.)

  • 1869: Parisian bicycle mechanic Jules Suriray patents the use of ball bearings in bicycles. British cyclist James Moore would later ride a bearing-equipped bicycle built by Suriray to victory in the world’s first road bicycle race.

  • 1870: Belgian immigrant Edward de Smedt invents asphalt pavement at Columbia university.

  • 1883: Bicycle and sewing machine manufacturer Friedrich Fisher invents the ball grinding machine, allowing for the manufacture of large volumes of hardened steel balls that are perfectly round and uniformly sized. This leads to the creation of the ball bearing industry.

  • 1884: After pioneering the use of rebar in concrete, Ernest Ransome completes the first iron-reinforced concrete building, the Arctic Oil Company warehouse in San Francisco.

  • 1891: The first concrete street is laid down in Bellefontaine, Ohio.

  • 1901: English surveyor Edgar Hooley invents “tar-macadam,” a road surface made from gravel suspended in tar that is spread on the road and rolled flat. We know this today as tarmac.

  • 1907: Shotcrete is invented.

  • 1908: James Leonard Plimpton patents the modern roller skate, with four wheels mounted on two lean-to-steer trucks.

  • 1931: German furniture manufacturer Gebrüder Thonet releases the S43 cantilevered chair, featuring a three dimensional molded plywood seat and backrest.

  • 1931: Elastic insert lock nuts are invented.

  • 1937: Otto Bayer discovers basic polyurethane chemistry.

  • 1938: DuPont chemical receives a patent for Nylon, the first commercially available thermoplastic, later used in nylon-insert lock nuts.

  • 1943: Charles Eames designs a molded plywood leg splint for injured soldiers.

  • 1949: Vulcanized rolling polyurethane rubber is invented.

  • 1973: Improved thermoplastic polyurethane roller skate wheels are popularized.

Comment Section: Helmets, Media, and Responsibility

This article originally appeared on Skate House Media in 2013, one day after I wrote a scathing line-by-line takedown of a web post Liam Morgan had written about why he sometimes skated without a helmet during photo and video shoots. That post had enraged his sponsors, who were major advertisers on the website, and they demanded that it be taken down and that I be fired. After the initial post was deleted (it is now lost to the ages), I wrote this piece to explain why I felt so strongly about the issue. You can see an archived version of it on the Wayback Machine.

James Kelly is loaded into an ambulance after hitting a car in 2011.

James Kelly is loaded into an ambulance after hitting a car in 2011.


This piece is about helmets and photo shoots and why I think it’s important that pro riders wear safety gear when they appear in media.

I.

Three years ago I went out to shoot photos with James Kelly. We set up on a blind left corner with a steeply banked inside lane. The idea was to get a shot of him hitting the apex super hard, then move on to the next spot. James hiked up far enough to get some good speed, put his headphones on, and kicked in.

Seconds after I gave him the all-clear, a Toyota Prius came into view. I yelled up the hill about the car, but James did not hear me. He hit the front of that car going about 25mph. His board wedged in the front bumper and he was taken to the hospital.

When I went to pick him up from emergency room I found him laying in bed, wiggling his toes to reassure himself that he wasn’t paralyzed.

II.

I care about the safety issues inherent to downhill skateboarding because they are real to me in a way that they aren’t to most people.

I myself have destroyed helmets and gotten hurt in random, unpredictable crashes. A month after I got slide gloves, I smashed my head doing a hands-down toeside on hard wheels and had to get my scalp stapled shut. Right after I moved to California I did a slide to let a motorcycle pass on my local run and got hit by the front wheel, tearing a ligament in my shoulder. Two years ago I hit a crack shutting down toeside and flew backwards onto my head at the bottom of a local run I’ve skated hundreds of times. Last year someone dipped their wheel off the inside of a right turn at Maryhill and crashed in front of me, causing me to flip over backwards and smash my head at full speed.

I was skating behind Nick Dunmall when he rubbed wheels with Zak Maytum and broke his shoulder at Maryhill.

I was skating behind Billy when he crashed at 78mph in Colorado and picked him up from the hospital after he smashed his head at Angie’s Curves.

I was there when Dustin Hampton suffered terrible internal injuries at Barrett Junction and when AJ Haiby compound fractured his arm a year later.

I saw Erik Lundberg wobble out footbraking at 60mph at Peyragudes and heard his helmet crack the pavement as he tumbled to a stop.

I was sitting on the side of the road watching when a Landyachtz rider went off the cliff in Malibu and fell all the way to the canyon floor.

I was filming when Pjäx Christner was knocked unconscious for two minutes after another rider crashed into him at Kozakov. I turned off the camera when he woke up screaming in pain and didn’t film the helicopter that airlifted him to the hospital.

“Safety” is an abstract concept to most longboarders, something they know they should pay attention to but don’t spend a lot of time worrying about. It’s something I think about on a daily basis.

III.

Downhill skateboarding is uniquely dangerous compared to street and transition. Thirty people died skateboarding in America last year. None of them were skating street or transition. Every single death was in the road: 24 people died after being hit by cars, the other 6 fell bombing hills without helmets. (Two of those killed by cars had helmets on.)

IV.

No, I don’t put a helmet on every single time I step on a skateboard. Yes, everyone is free to do as they please; nobody can force anyone to wear a helmet all the time. Helmets are not the be-all and end-all of skateboard safety–it takes a great deal of knowledge and experience to skate hills with a reasonable degree of safety. But helmets are definitely a good start.

V.

I am a professional photographer who has exclusively shot downhill skateboarding for the last four years. With very few easily dealt-with exceptions (low-profile knee pads with shorts; kneepads over jeans; ugly, visually-busy sticker jobs; etc), I do not believe helmets or safety gear make skate photos look bad. To the contrary, I think the colorful, visually exciting safety gear used for racing can greatly enhance what would otherwise be a fairly boring picture.

VI.

The culture of this sport is a reflection of the industry that sponsors riders and funds the media organizations that cover them.

The skate media has a tremendous influence on everyday skaters. Kids emulate the pro riders they see in videos and magazines. When kids saw Louis and James stand-up sliding in open face helmets, they started doing the same. When they see George Mackenzie wearing an old school full-ear helmet, kids go out and buy full cuts. Every time I post a photo of Zak Maytum online someone asks where they can get an aero helmet like his. Whether they acknowledge it or not, pro skaters are role models.

Those of us in business and media positions in the skateboard industry have a great deal of power over the sponsored riders who promote our products. There are many more talented, sponsorship-worthy skaters than the industry can support. If I told an unknown, unsponsored kid at a slide jam that he would get on the Venom team and be featured on the front page of Skatehouse or in the pages of SkateSlate if he’d be willing to skate without a helmet, you can bet that he’d have that helmet off and be throwing switch backside powerslides before I had time to get my camera out. Similarly, if I told that kid that he’d be kicked off the team if we ever caught him skating without a helmet, he’d be damn sure to put a lid on every time he stepped on a board, and especially when the cameras were out.

As an industry, we have a responsibility to keep kids as safe as possible when they use our products. I am proud of longboarding’s industry-wide consensus on helmets and support companies that encourage their riders to protect their health and safety through the use of appropriate protective equipment.

Encouraging helmet use is in everyone’s long-term best interest. We don’t need to preach; leading by example has worked well so far. Let’s keep this good thing going.

– Max Dubler

Letter of Recommendation: Cutting The Liner Out Of Your Leathers

I wear my leathers every time I skate downhill because (a) I am, fundamentally, a coward; (b) having road rash sucks; and (c) if I don’t, I spend more money on first aid supplies than I make in pro-model board royalties and my ego absolutely cannot handle that.

Of course, riding in leathers has some minor drawbacks. They can be uncomfortably warm on hot days. You look like a sport motorcycle weirdo may attract the attention of homosexual leather fetishists. (This is, emphatically, not a problem for me.) Finally, even the best-designed skate suit can bind up between your knee and your shoulder, restricting your flexibility and range of motion when crouching down for slides. For a long time, I accepted these tradeoffs as the price of not waking up with road rash that had fused to my bedding. We all make choices in life.

Last year, after hearing my friends sing the praises of unlined leathers for several months, I finally took the lining out of my NJKs. All it took was a sharp pair of scissors and some patience (be careful around the zippers).

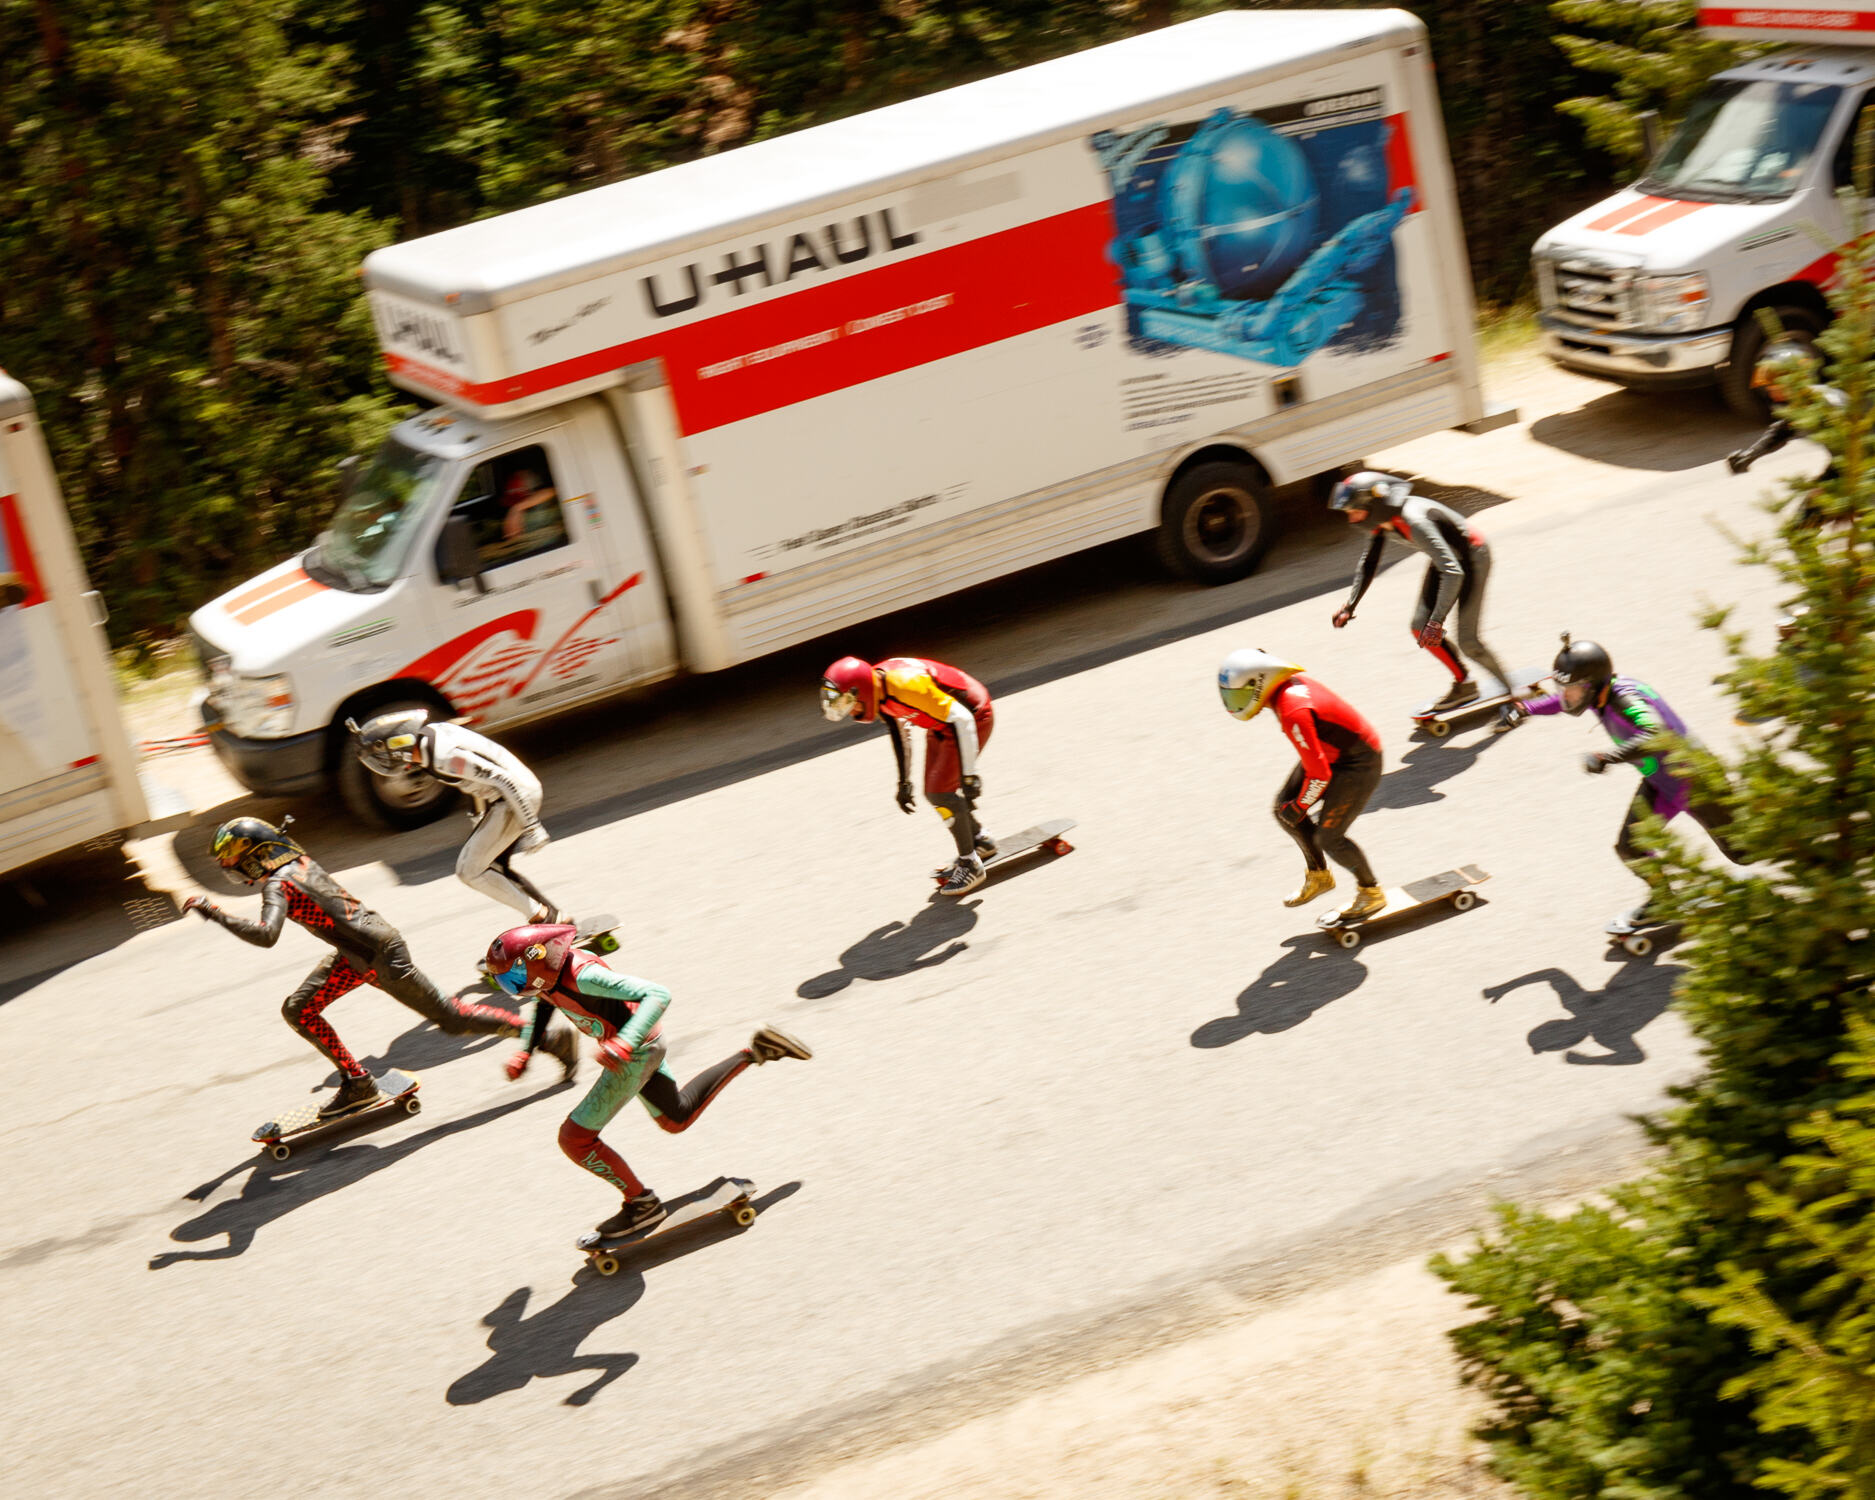
I was immediately impressed by how much easier it was to move in them. Instead of binding up when I crouched down for a heelside, my leathers slid easily over my body, restoring a full range of motion. This was a game-changer, and it has made skating in leathers feel functionally identical to skating in street clothes, a fact that I have been annoyingly vocal about in downhill-event U-Haul trucks across North America.

Without a liner, you will need a full-body base layer to put something between your body and the leather. I personally prefer one-piece skins like these (cut the stirrups off). Other riders swear by UnderArmour’s moisture wicking HeatGear leggings and shirts. If you don’t care about brand names, cheaper compression shirts and leggings will also do the trick.

Yes, this is one more thing to bring with you when you go skating; but unlike your leathers, skins can be washed in a regular machine; so you’ll be considerably less stinky and/or bleeding at the end of the session.

(These are Amazon affiliate links, from which I will make a small commission.)

Devil's Peak Downhill 2019

A couple weeks ago I went out to Colorado to skate and serve as the event photographer for the third annual Devil’s Peak Downhill race. I was there thanks to a partnership between Comet Skateboards and Justin Rouleau, the event organizer. Here’s what happened. (You can click each image in these gridded galleries to see the full frame)

I arrived on Tuesday before the race to get acclimated to the altitude and to help Justin with any last-minute organizing. That first afternoon, the main task was reviving Zak Maytum’s Fool Injector, an electric beer bong made from an assortment of high end racing skateboard parts and a (used) hot rod fuel pump that made its last appearance at the 2012 Buffalo Bill race. After some minor reassembly, cleaning, and electrical troubleshooting, it was ready to go. (Mercifully, unlike the original, the reincarnated version does not make your beer taste like gasoline.)

On Wednesday afternoon I headed out to a brand new pump track for a session with Aaron Breetwor and some of the new Comet Skateboards cruisers. I have slammed super hard every time have skated a pump track; so I grabbed my camera and channelled my inner Edward Weston as the sun went down. (For the curious, this pump track is at Anthem Community Park in Broomfield. It’s kinda hard to find so here’s a Google Maps link to its actual location. )

Wednesday night’s Pagan Party marked the unofficial beginning of Devil’s Peak festivities. Skaters from around the country and the world gathered at legendary downhill skater and ice climber Kevin Cooper’s high country compound for a night of reuniting with old friends, fire jumping, saw blade throwing, and Fool Injecting before getting up at 5am to skate at first light.

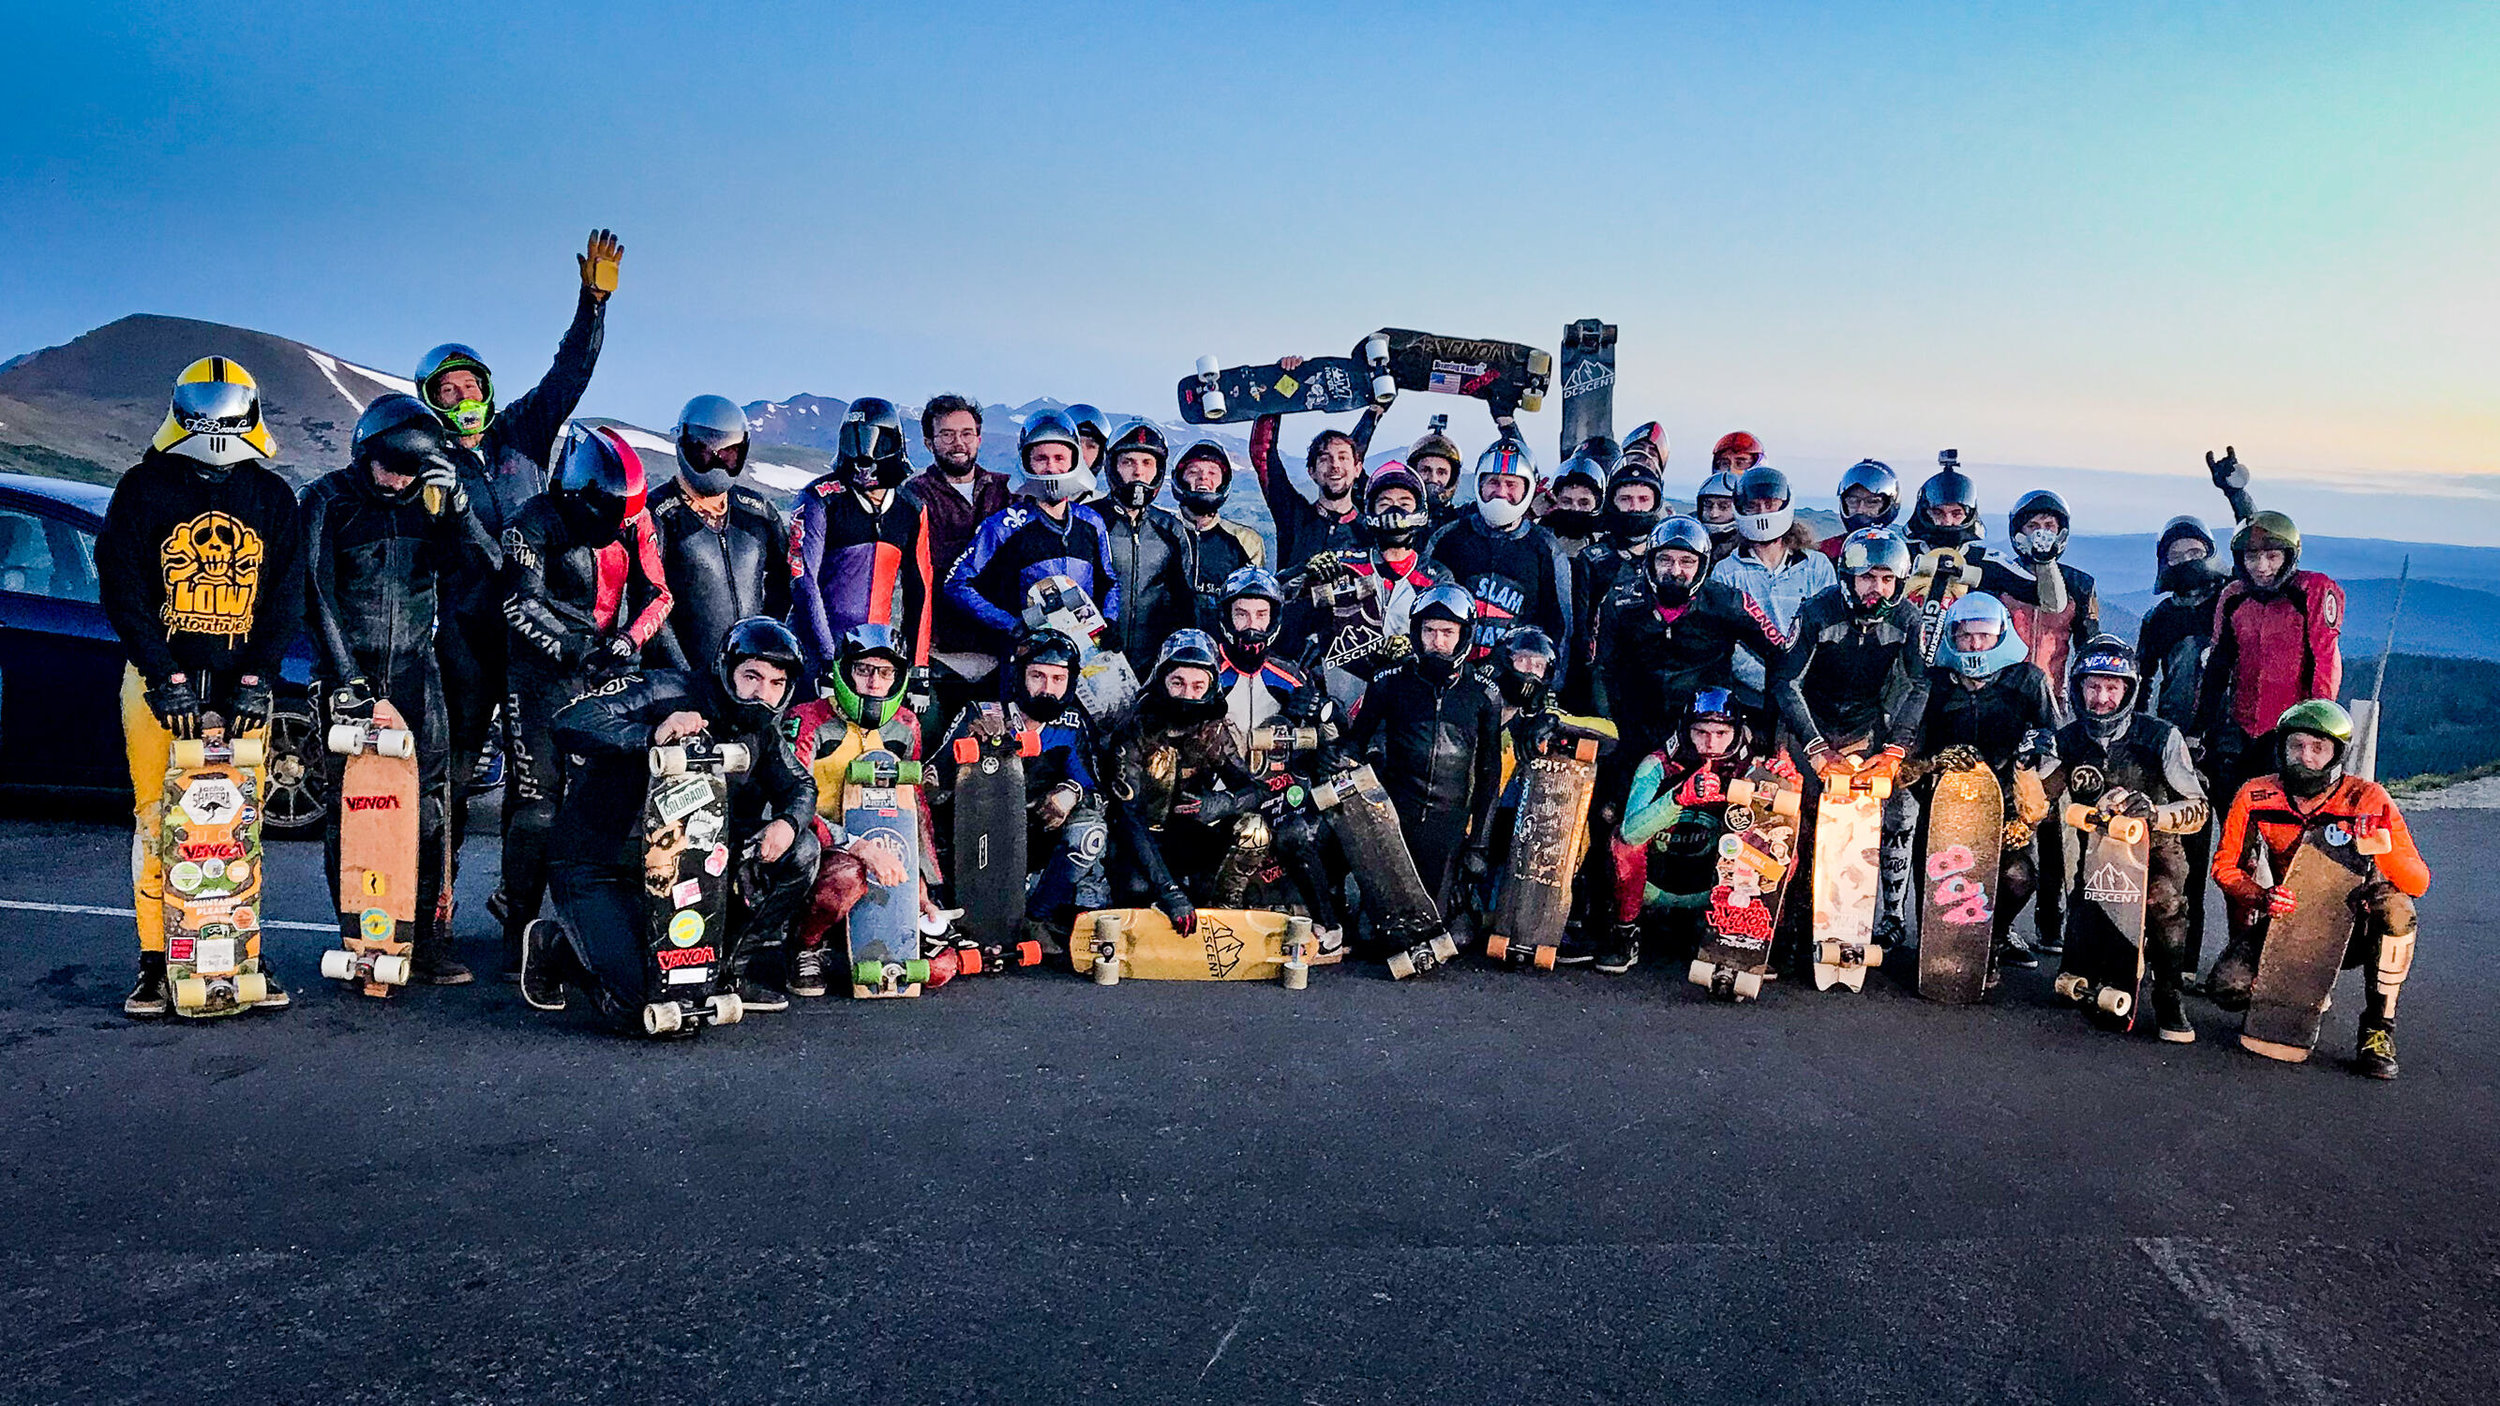
After a few hours of sleep, we rolled out in the dark, arriving at the top of the hill in time to catch the full moon setting. After an exchange of high fives, a group photo, and a brief elk-safety lecture from Coop and Rouleau, the assembled skaters dropped in as a huge pack.

I have been going to Colorado to skate downhill since 2010. This year was the first time I have ever really enjoyed dawn patrol. Unlike in previous years, when I endured the distinctly unnerving experience of standing on a skateboard moving at 55mph with numb feet, it was relatively warm; so I could feel my feet the whole time. Having finally memorized the road, I was no longer worried about unexpected tight corners. Aside from the mild altitude effects—Zak and Justin got it much worse—I had a great time.

I kept it pretty chill until Friday, when we headed up to Georgetown for the official start of Devil’s Peak.

Saturday dawned bright and early at the campsite and we made our way to the hill for a day of practice/freeride runs. Thanks to Justin and Ty’s excellent management, I got about ten hot laps before taking off my gear to shoot photos.

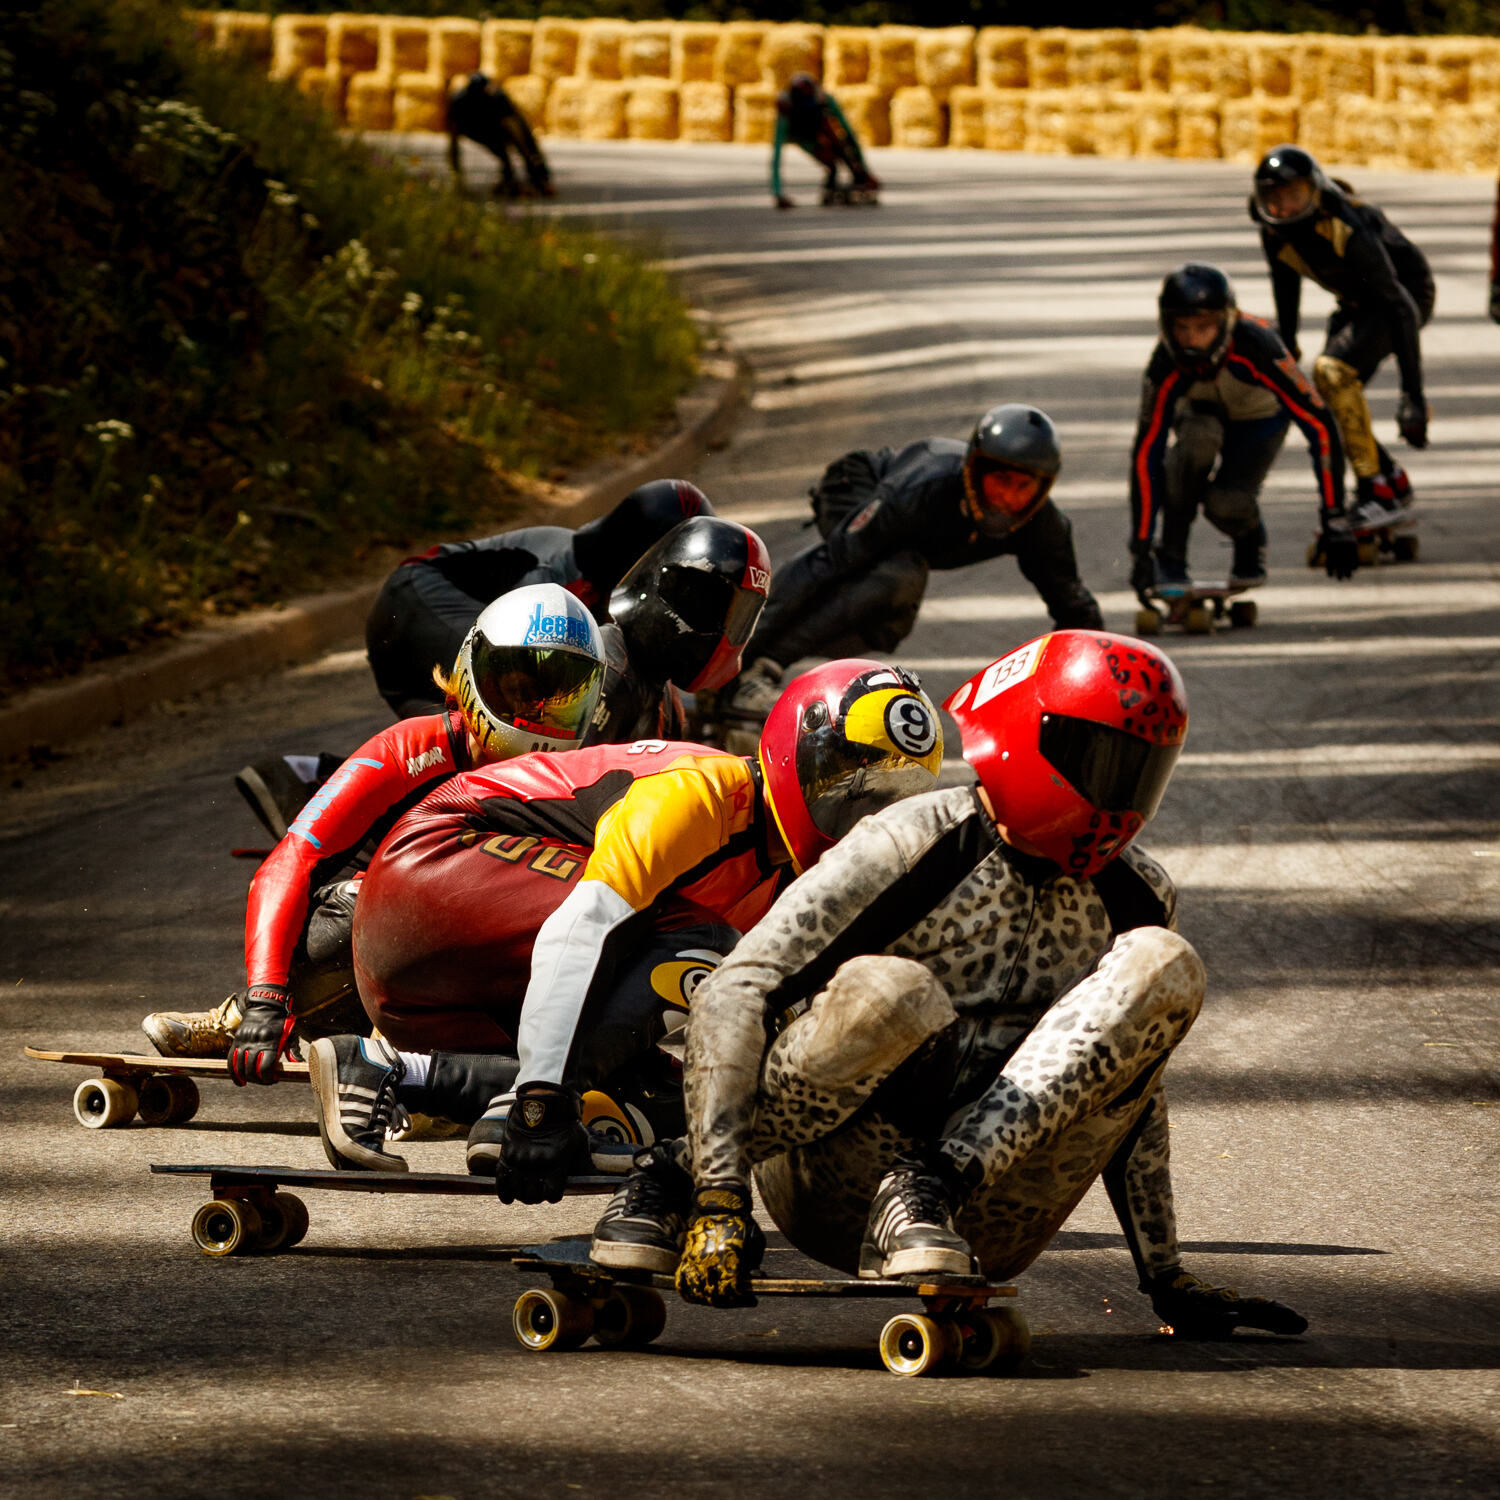
This is one of the better downhill skateboarding photos I’ve shot. Daina Banks, Micah Green, Emily Pross, Zak Maytum, and many others.

This is one of the better downhill skateboarding photos I’ve shot. Daina Banks, Micah Green, Emily Pross, Zak Maytum, and many others.

Almost every top racer in the world was in attendance at this year’s Devil’s Peak, and that was evident in the quality of the riding. Big packs of skilled riders came hauling into high speed sliding corners inches apart and for the most part, everyone held it together. It was cool to watch.

Apart from a brief rain shower that dried in minutes, the weather held all day and we got a remarkable 20 runs; plenty enough to tire us out before the Wheel of Death.

Every downhill skateboard race organizer has to find a way to balance riders’ competing desires for fair racing brackets and lots of freeride runs. Sending each rider down for an individual timed run gets you the fairest possible brackets; but that requires an expensive timing system and, more importantly, takes all day.

In the interest of maximizing freeride time, Colorado races traditionally employ a “Wheel of Death, Hand of God” qualifying method in which each rider’s name is written on a wheel of fortune, which is spun to seed the bracket. The “Hand of God” rule refers to the organizers’ use of his own discretion to manipulate the bracket however he wants, whether to separate fast riders for fairness or to arrange first-round grudge matches between rivals.

The wheel also sometimes requires riders to make ritual offerings to the Pagan gods of the high country by throwing their socks in the fire, doing a chainsaw shotgun, or having the sleeves of their shirt ripped off.

When the ceremony is over and the bracket is filled out, the wheel itself is offered up to the Pagan gods as a fiery sacrifice.

This year’s Wheel of Death started unusually early in the evening to avoid disturbing other residents of the campsite, which meant we all got a good night’s sleep before race day.

Sunday went as expected, with practice runs all morning and racing in the afternoon. Rouleau, Ty, Allie, and the rest of the team kept things moving along.

When it all shook out, Chase Hiller snagged first place. Daina Banks recovered from a first-round crash to come in, with Harper Knight third, and Riley Irvine in fourth.

I put the camera away after the podium and enjoyed the Sunday night campsite party before flying back to LA on Monday. Special thanks to Justin Rouleau, the entire Devil’s Peak crew, and Comet skateboards for getting me out there.

Some Thoughts on Gatekeeping In Skateboard Culture

Many skateboarders strongly identify as skaters and are very invested in the idea that, as skaters, they are members of a prestigious elite group of renegade outlaw athlete/artists. These skaters often have a sense of ownership over skateboarding and feel it is their responsibility to protect skateboarding from outsiders who they see as trying to change, corrupt, or co-opt this thing they love so much.

These guys see longboarders as dilettantes who are trying to steal their glory* by claiming to be skaters without suffering through the hard work, frustration, palm scrapes, and minor orthopedic injuries required to learn how to kickflip down a six stair. Talking trash about these “longboard kooks” provides an opportunity to make fun of strangers while reinforcing the skater’s identity as a member of an elite in-group.

That in-group/out group dynamic also manifests as a suspicion of women and lgbt people who skate, many of whom are accused of being posers because they wear skate-branded clothing without having met some arbitrary definition of “paying your dues.” This comes marbled in with garden-variety “she’s just doing this to get guys” and “she’s only sponsored because she’s a sexually attractive woman” sexism and low-grade “I don’t understand why you have to flaunt your sexuality in the skatepark” homophobia**.

Suspicion of and hostility toward outsiders has been actively encouraged by a legacy skate industry wary of competing with big businesses. Convincing kids that purchasing your sub-par sneakers at premium prices is a blow against Big Corporate is fantastic marketing. Declaring yourself the Bible of Skateboarding is a great way to extract lots of ad dollars from Big Corporate. If hating on longboarders helps you do that, well, go ahead and call them fags.

This anti-outsider attitude is bad, wrong, and unsustainable as skateboarding moves into the mainstream.

While lots of rad people skate, Being A Skater does not make you cool or smart or interesting or a member of a prestigious club, it just means you skate. Plenty of extremely talented skaters are genuinely terrible people: Jay Adams single handedly made skateboarding cool, then beat a gay dude to death and spent the rest of his life being a junkie loser. Jason Jessee had the cover of Thrasher last year and that dude is a literal Nazi. Gator killed a girl. Koston is kind of a douchebag on social media. I sometimes wait until the last second to merge into busy traffic. You get the picture. Skaters are just people.

Being a gatekeeping asshole about skating might make you feel superior in the moment but telling people who don’t look like you or skate like you that they aren’t real skaters is a dick move that helps keep skateboarding white, male, and straight by sending the message that difference isn’t welcome. We don’t actually lose anything when a stranger calls herself a skater because she pushes to work on a drop-platform longboard every day. Skateboarding is awesome. Why wouldn’t we want more people to do it?

The idea that you, me, Thrasher Magazine, or anyone else needs to “protect” skateboarding from hordes of businessmen, longboarders, girls, and homosexuals who want to co-opt** or change it is reactionary nonsense that has made skateboarding insular and exclusive, and for what? Skateboarding’s past is, uh, not great. Some change is a good thing.

The only rules in skateboarding are that there are no rules and you can do it yourself. Skateboarding is going to be just fine, even if someone, somewhere is doing it in a way you don’t like. There is no need to be a jerk to people who do it differently.

*I have been a pro longboarder for years. I can assure all of street skateboarding that none of us are trying to do a “stolen valor” on your frontside flip or culturally appropriate Dickies, Vans, and Thrasher shirts. Calm down.

**OBVIOUSLY, there is no real equivalence between the systemic injustice of misogyny and hating longboarders, but they’re both products of skate culture’s longstanding distrust of outsiders.

Why is Thrasher Magazine Trying to Rehabilitate Jason Jessee's Reputation?

Thrasher Magazine is to skateboarding what Vogue is to fashion: a tremendously powerful legacy publication run by a legendary editor who is capable of single handedly bestowing legitimacy upon an up-and-coming new talent. Appearing in the magazine is an important boost to any skater’s reputation and being featured on the cover of “the Bible” is considered an honor and a major career highlight.

Last May, 48 year old Santa Cruz pro Jason Jessee got his first Thrasher cover, an early evening fastplant to fakie on a vert ramp. At the time Jessee was a successful pro skateboarder and custom motorcycle builder who was enjoying a late-career renaissance as a brand ambassador and influencer, having just released a major video part for Converse.

Within days of the release of that video part, a now-deleted thread on the popular SlapMag.com skate forum revealed that he has a long and well-documented history of using racial slurs in interviews, displaying swastikas and other racist imagery on his body and in his artwork, and palling around with neo-nazi band the Highway Murderers. These revelations, which were summarized in a damning YouTube video and written up in Vice, made Jessee toxic to sponsors: he lost all of his endorsement deals within weeks.

Thrasher is notoriously petty about banning skaters from its pages based on the personal whims of its longtime editor, Jake Phelps, who recently died. Benji Galloway, a transition pro, is apparently banned for wearing knee pads at a contest. Frank Hirata is banned for expressing displeasure with the editing of his interview. Danny Gonzalez is banned for demanding payment for use of his likeness on the cover of the Thrasher video game. The list goes on.

Jason Jessee has appeared on the Thrasher website five times in the year following the Nazi revelations, including a recent video segment that concludes with other skaters literally bowing down to him. He has a positive mention in the latest issue of the print magazine as well.

Jason Jessee is not an especially talented or influential skateboarder in 2019. On the board, he is a replacement-level vert Barney who hasn’t done a new trick in 20 years. Fully half of his video parts are “lifestyle” footage of him riding bikes, driving around, and generally being a dirtbag. His appeal to skaters is based on his personality, image, and lifestyle, which has lost much of its appeal following the exposure of his white supremacist ties. (His recent arrest for possession of a stolen vehicle and an illegally modified assault rifle haven’t helped anything.)

Why does he keep appearing in Thrasher? Why do kneepads at a contest get you banned while repeated use of Nazi symbols doesn’t? What the hell is going on over there?

Narrow Hangars for Downhill and Freeriding, Explained

Are you confused about why everyone seems to be in an arms race to ride the skinniest trucks they can find? I was too, until I tried them out. This article is my attempt to explain why all the top pro riders’ boards are an inch and a half skinnier than they were 3 years ago.

Why 180s?

Why are so many people switching to these narrower hangar widths and what do they mean for your setup? Before we get to that, we should ask why everyone was riding 180s for so long.

Way back in the prehistoric times of 2007, basically all of our gear was bad and the central problems of downhill skateboarding gear design were stability—the need to avoid wobbling out—and braking—the ability to slow down in a controlled manner without crashing.

180mm trucks helped solve those problems.

Wide hangars make your board more stable and less prone to wobbles because getting a setup with a wide track width (the combined width of your trucks and wheels) to lean over and turn requires more force, especially when your board is relatively narrow. You won’t wobble if you can’t really turn, and 180s made it hard to turn.

Wide hangars and long wheelbases also helped with braking by smoothing out slides at a time when most wheels were prone to chatter, even when broken in, and we thought BigZigs were good freeride wheels.

Over the past ten years we have essentially solved the problems of stability and braking through advancements in truck geometry, wheel design, riding technique. At this point, the central issues of gear design have shifted away from basic issues of control and safety toward creating higher-performing gear that is easier and more fun to ride.

(As an aside, I think that we are in the middle of a radical cleavage between freeride and racing setups, with race boards becoming much narrower, shorter, and more aggressively directional slalom-type setups while freeride boards continue to look like most downhill longboards, albeit narrower. 2022 update: more on the little board thing here.)

Through these advancements, the 180mm truck width has mostly stuck around out of tradition and inertia: most trucks were 180s, most boards were designed to fit them, and aside from some short-lived and unpopular experiments with 195s, nobody really thought to try anything else.

Why narrow hangars?

A few years ago, some downhill guys started chopping their trucks down and realized that a narrower setup can grip harder and slide more crisply than a wider setup, setting off a flurry of experimentation among high-level gear nerds. Eventually this trickled down to me. I gave narrow hangars a try shortly after the Venom Magnum came out.

I found that riding skinnier trucks has two major performance benefits: first, narrow hangars can make your board feel grippier and more responsive, especially when riding wide wheels like Venom Magnums that would otherwise make your track width (again, the combined width of your trucks and wheels, from lip to lip) considerably wider. That said, when you pair your narrower trucks with a narrower deck, you get the improvements in maneuverability while the grip and slide characteristics are basically unchanged. It’s not grippier or slidier or very different at all. It’s just narrower and easier to turn.

Second, and relatedly, as a dude with size ten feet, I find this narrower setup noticeably easier to ride. The deck I’m riding right now tapers from about 9.25” in front to around 8.25” in back. That sounds crazy skinny compared to most longboards, which are around 9.5-10” wide; but it puts the rails directly under the ball and heel of my back foot, which allows me to do toeside and heelside slides without moving it. This also helps me get more on top of the board for more braking power, as I’m pushing straight down into the surface of the deck rather than sideways on the rail. When you stop to think about it, this makes a lot of sense: most street decks are between eight and eight and three quarters inches wide. Why should longboards be much wider?

The bottom line is that after 10 years of the 180 being THE standard, truck width is simply one more thing you can tune to fit your personal riding style.

Dialing in your setup.

Now, switching to narrower trucks requires adjusting some other parts of your setup. The main thing you need to consider, even more than absolute hangar width, is the relationship between track width and deck width. Slapping super-skinny hangars on a big wide board designed for 180s is gonna give you way too much leverage and make your setup tippy and prone to high-siding; so you are gonna want to pair your narrower trucks with a narrower board, whether this means busting out the bandsaw or buying a different deck altogether.

TRACK WIDTH VS BOARD WIDTH: Setup vs Riding Characteristics

Board wider than track width: Tippy, prone to high siding, extremely aggressive slide hookup, very maneuverable, less stable.

Equal: Good balance of stability and maneuverability, smooth slides with a crisp hookup. Ideal.

Board narrower than track width: Drifty, very stable, less maneuverable, less prone to high siding.

ACTUAL AXLE LENGTH OF TRUCK HANGAR SIZES

Hangar Width - Approximate Axle Length

  • 140mm - 8”

  • 150mm - 8.5”

  • 160mm - 8.75”

  • 170mm - 9”

  • 180mm - 9.5”

You’re also going to want to go down a step or three in bushing hardness, especially in your front truck if you’re running splits, because your suspension needs have changed. I dropped my front truck from a 93/90 combo to double 87a, and I still might go softer if I drop down to 140/150mm hangars. (Late 2019 update: I went to 85/85 with no loss of stability).

(Based on the fact that I can ride the same exact bushing setup in Rogue Slalom trucks as people half my weight, I am starting to suspect that most people’s ideal bushing setup has more to do with truck angle and hangar width than their weight, but that’s a topic for another day.)

Finally, narrower hangars really emphasize the difference between narrow freeride wheels and wide race wheels. The narrow Rogue hangars are spaceable so you can make sure your track width matches your deck by running the spacer on the wide or narrow setting.

The good news is that you probably don’t need to buy new trucks because you can send your current hangars out to Rolling Tree and have them machined down to whatever width you like.

Personally, I’m never going back to 180s. Narrow hangars and narrow downhill boards are one of those gear innovations, like the original Rogue truck or grippy brake soles, that provide an immediate and noticeable performance benefit, making skateboarding easier, safer, and more fun. They’re the kind of thing you want to tell your friends about so they can have a better time skating. Give ‘em a shot.